Audioguides / English
-

01 -

02 -

03 -

04 -

05 -

06 -

07 -

08 -

09 -

10 -

11 -

12 -

13 -

14 -

15 -

16 -

17 -

18


-
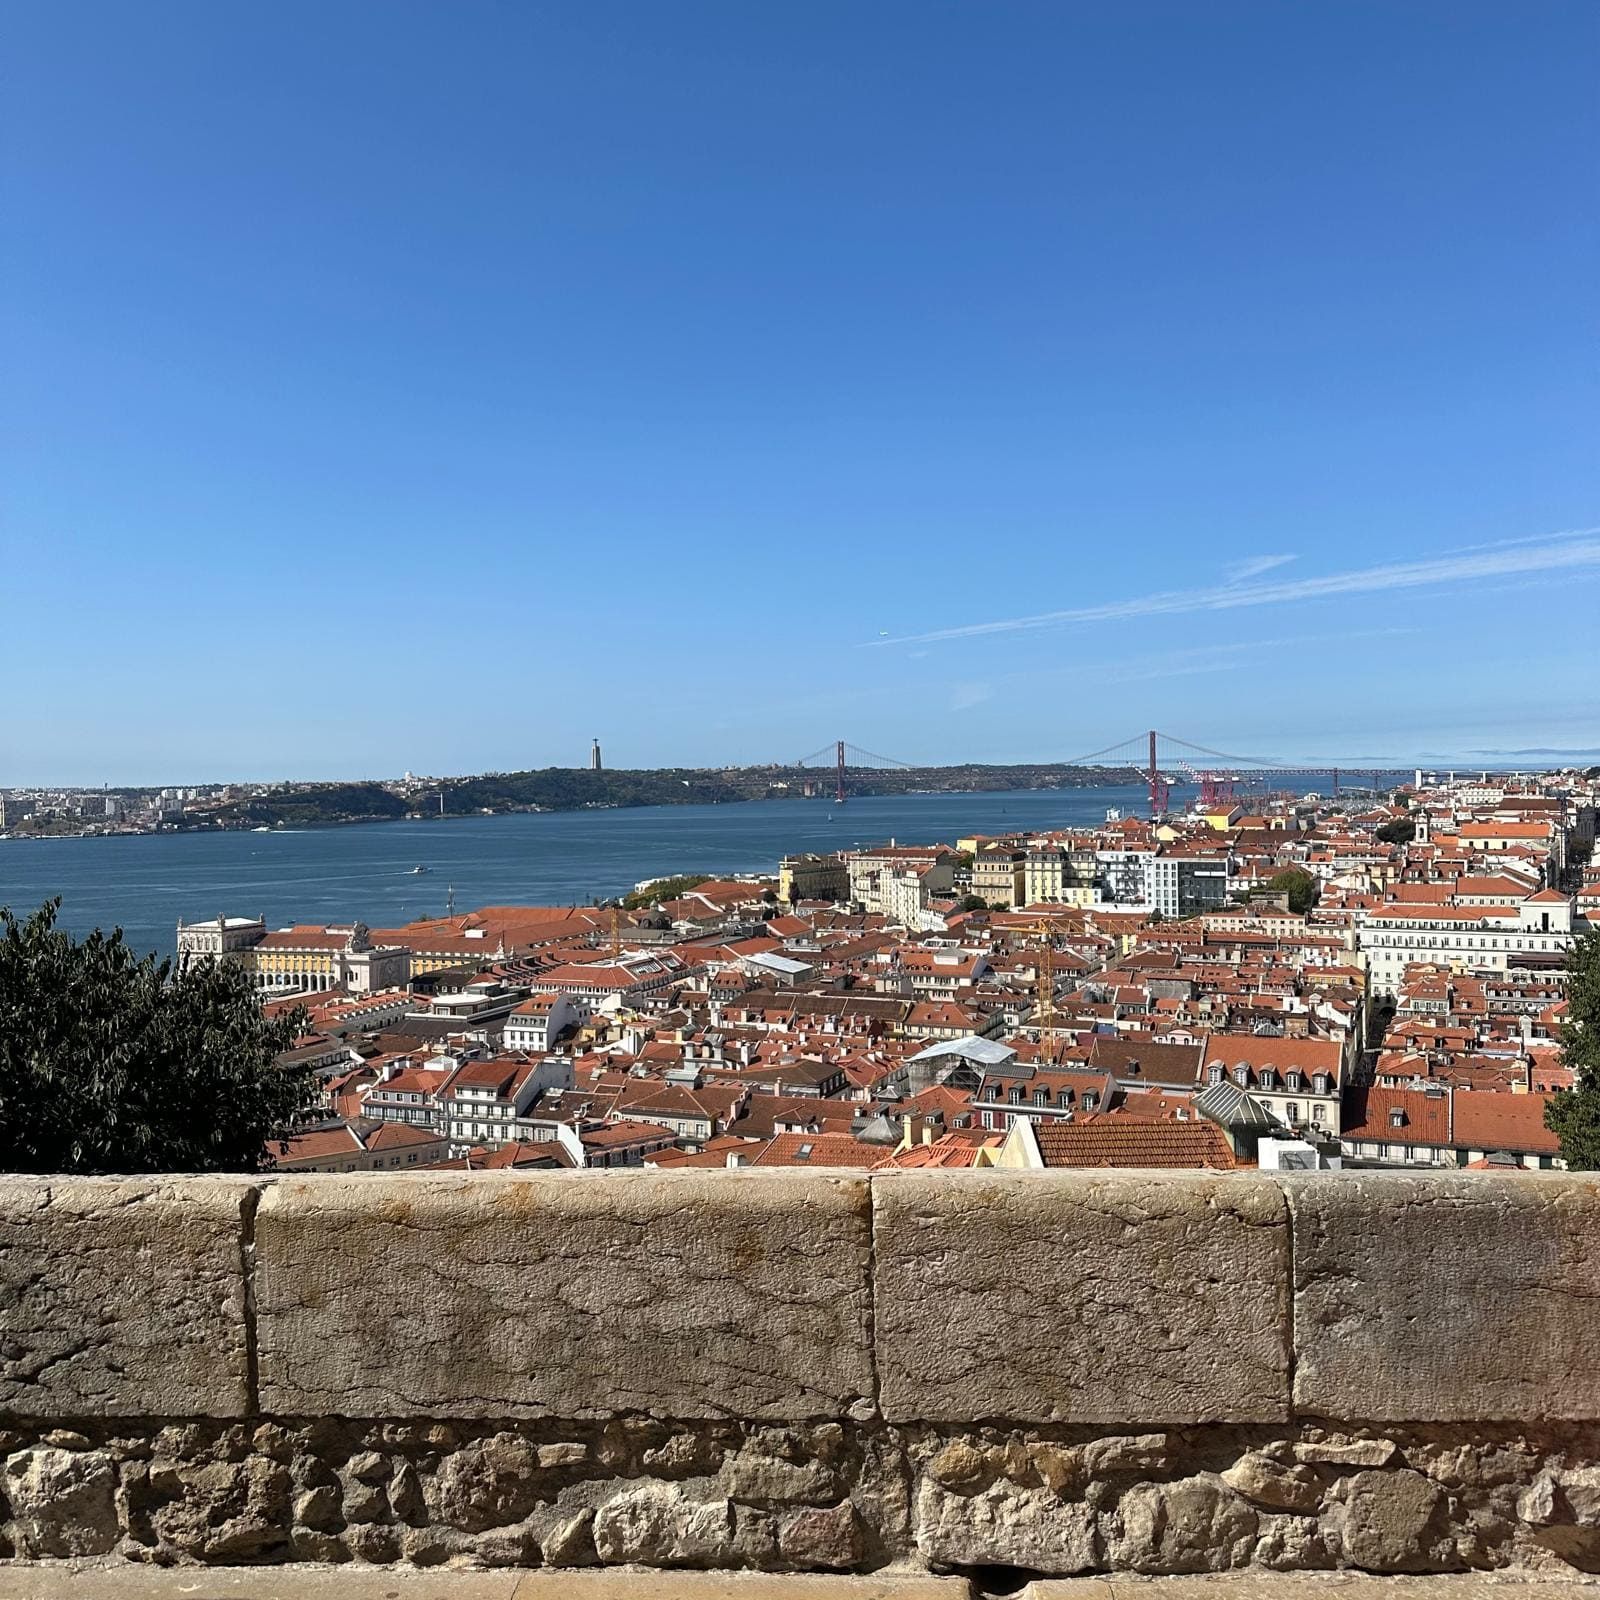
I – Place-of-Arms – viewpoint
Welcome to the Castelo de São Jorge, soldier!
Directions: Enter the castle and walk straight ahead
Location: In the Place-of-Arms, head towards the viewpoint with the river and bridge in front of youLisbon is a city whose foundation can be traced back to at least the 7th century BC, during the Iron Age, a period characterized by the expansion of trade and some Phoenician colonisation along the Mediterranean coast. Phoenicia comprised several city-states in the area of present-day Lebanon, southern Syria, and northern Israel. The Phoenicians dedicated themselves to exploring trade routes across the Mediterranean. Carthage, in modern-day Tunisia, was the most important of all these cities, but the Phoenicians also founded colonies on the Iberian Peninsula such as Malaka (Málaga), Gadir (Cádiz), and Olisipo, the earliest documented name for the city of Lisbon.
Following the fall of Tyre (the most important Phoenician city), Lisbon came under the sphere of influence of Carthage and subsequently became a target for the emerging rival power of Rome.
In 138 BC, Rome sent the Consul Decimus Iunius Brutus with an army to what is now Portuguese territory. It seems that Olisipo was not occupied by force and became an allied city.
Over time, the Olisipo of the Republican Period, became known as Felicitas Iulia Olisipo during the imperial period, one of the main ports on the Iberian Peninsula. It was also during this period that the first known wall was built, although it was not of a military nature and served only to demarcate the city limits.
As centralised Roman power came to an end, the city entered a period of political and social instability, eventually being occupied by the Suebi in 468 or 469, only to pass into the hands of their rivals the Visigoths during 469. The city would experience a period of decline during the Visigoth occupation, until the arrival of the Muslim armies of the Umayyad Caliphate.
-
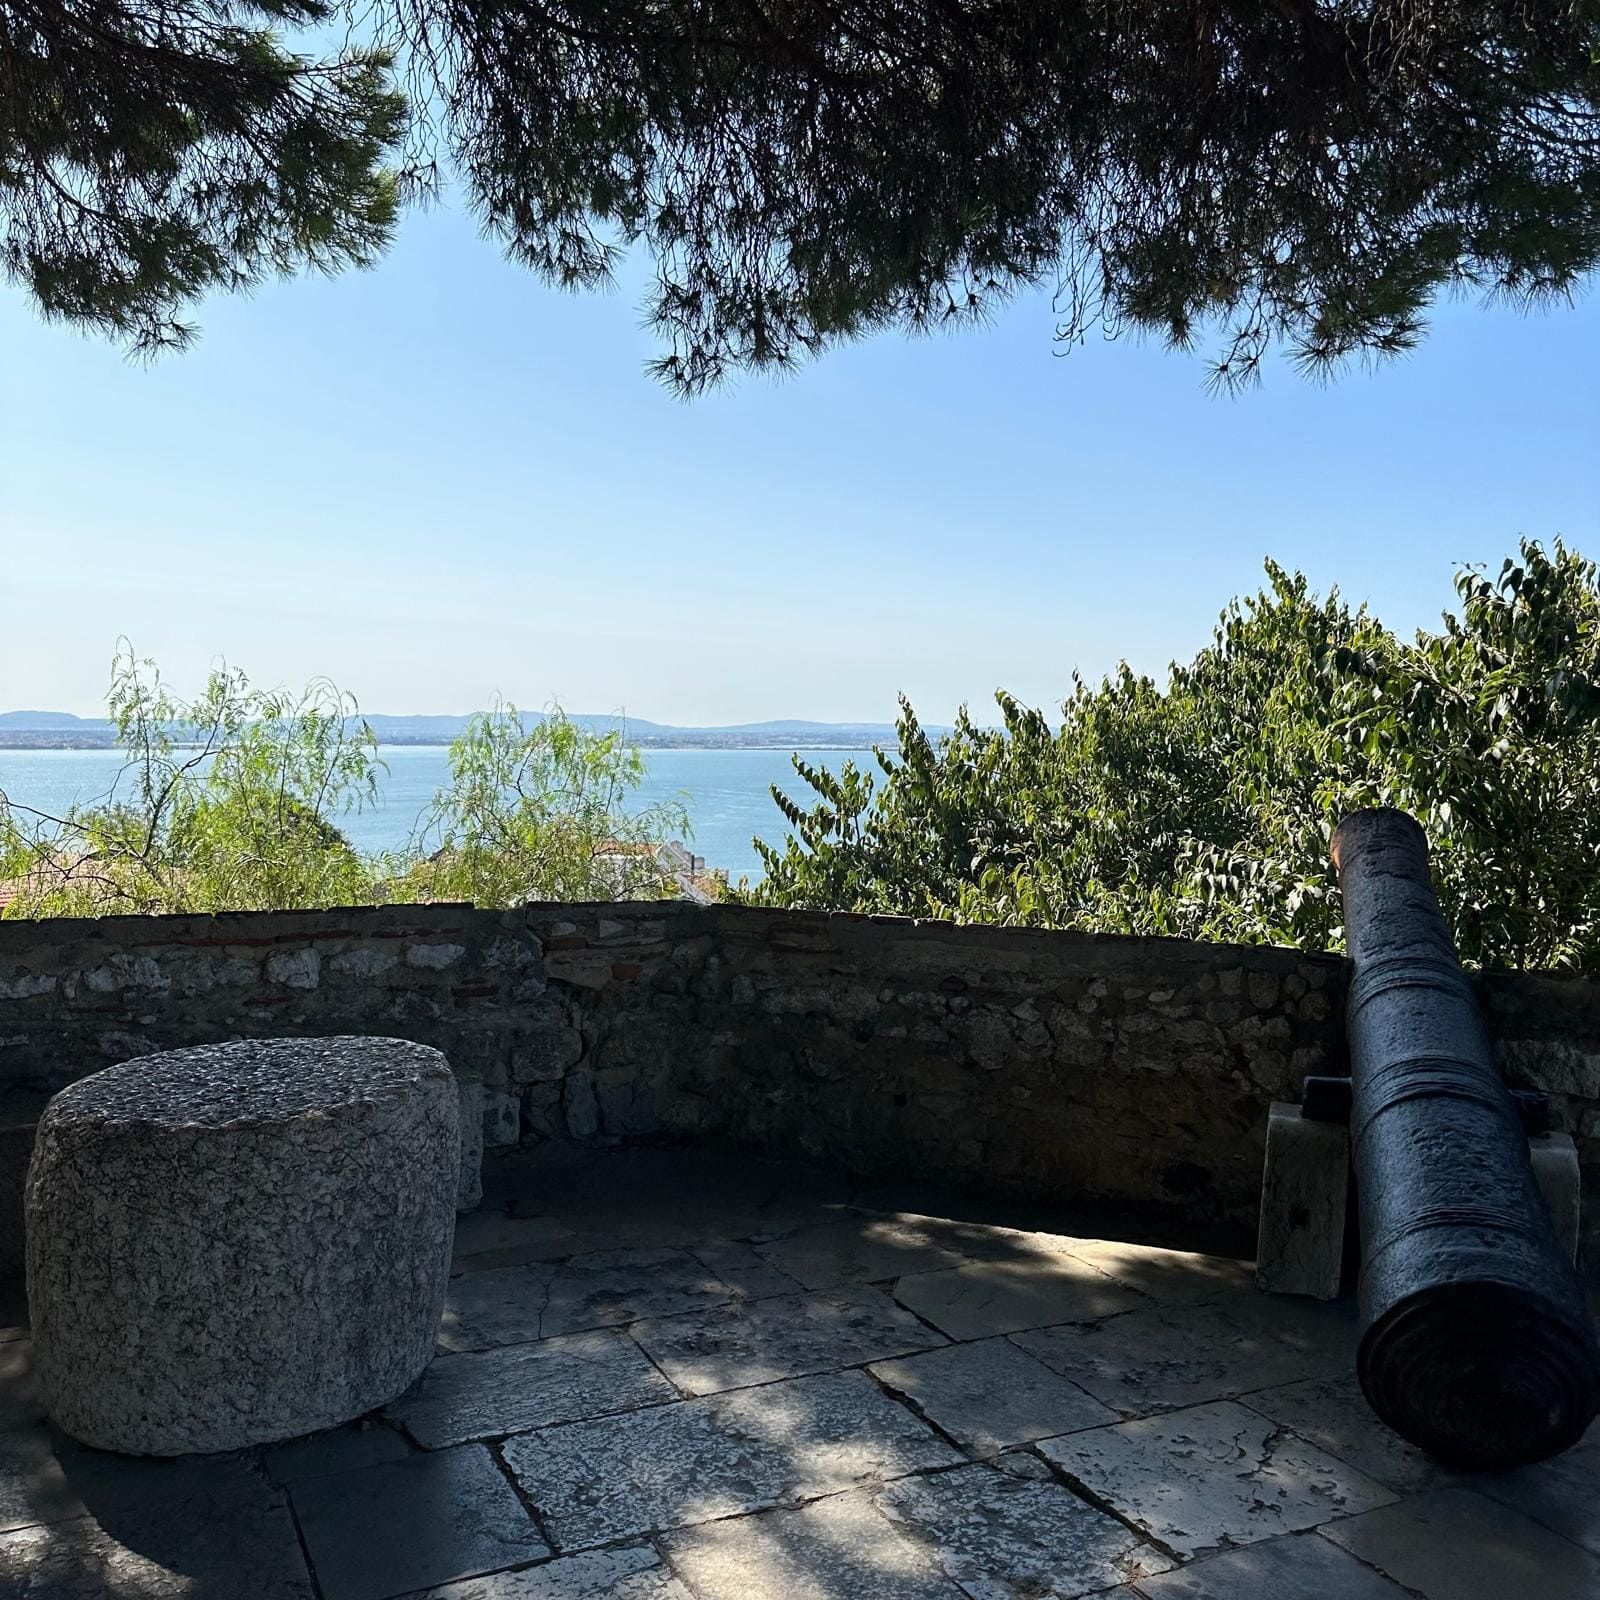
II – Place-of-Arms – Next to the cannon
Directions: Follow the wall on your left, until you reach the cannon and then face the opposite bank of the river
Location: Next to the cannonHaving arrived in the Iberian Peninsula in 711, the Muslim forces led by Tariq ibn Ziyad easily defeated the Visigoth troops at the Battle of Guadalete. This victory brought about a rapid occupation of the territory, thereby putting an end to the Visigoth Kingdom. The Visigoth city of Olisipona was occupied in 714 and became the Islamic Al-Ushbuna.
In the following centuries of Muslim rule, the city underwent a process of growth and development and became one of the main cities in the region. According to sources, the old Roman wall was improved in 985 by al-Mansur in order to protect the city, especially from Viking raids. Yes, you heard right, the Viking raiders made it all the way down here!
During this period, the city would adopt the layout of a typical Al-Andaluz metropolis, divided between the Alcáçova, or Kasbah, the fortified area we’re in at the moment where the elites lived, and the Medina, the city proper.
From the 11th century onwards, the Christian north, concentrated in the kingdom of Asturias, advanced on the Muslim south. It is within this context that the figure of Afonso Henriques, depicted in the statue behind you, emerged.
-
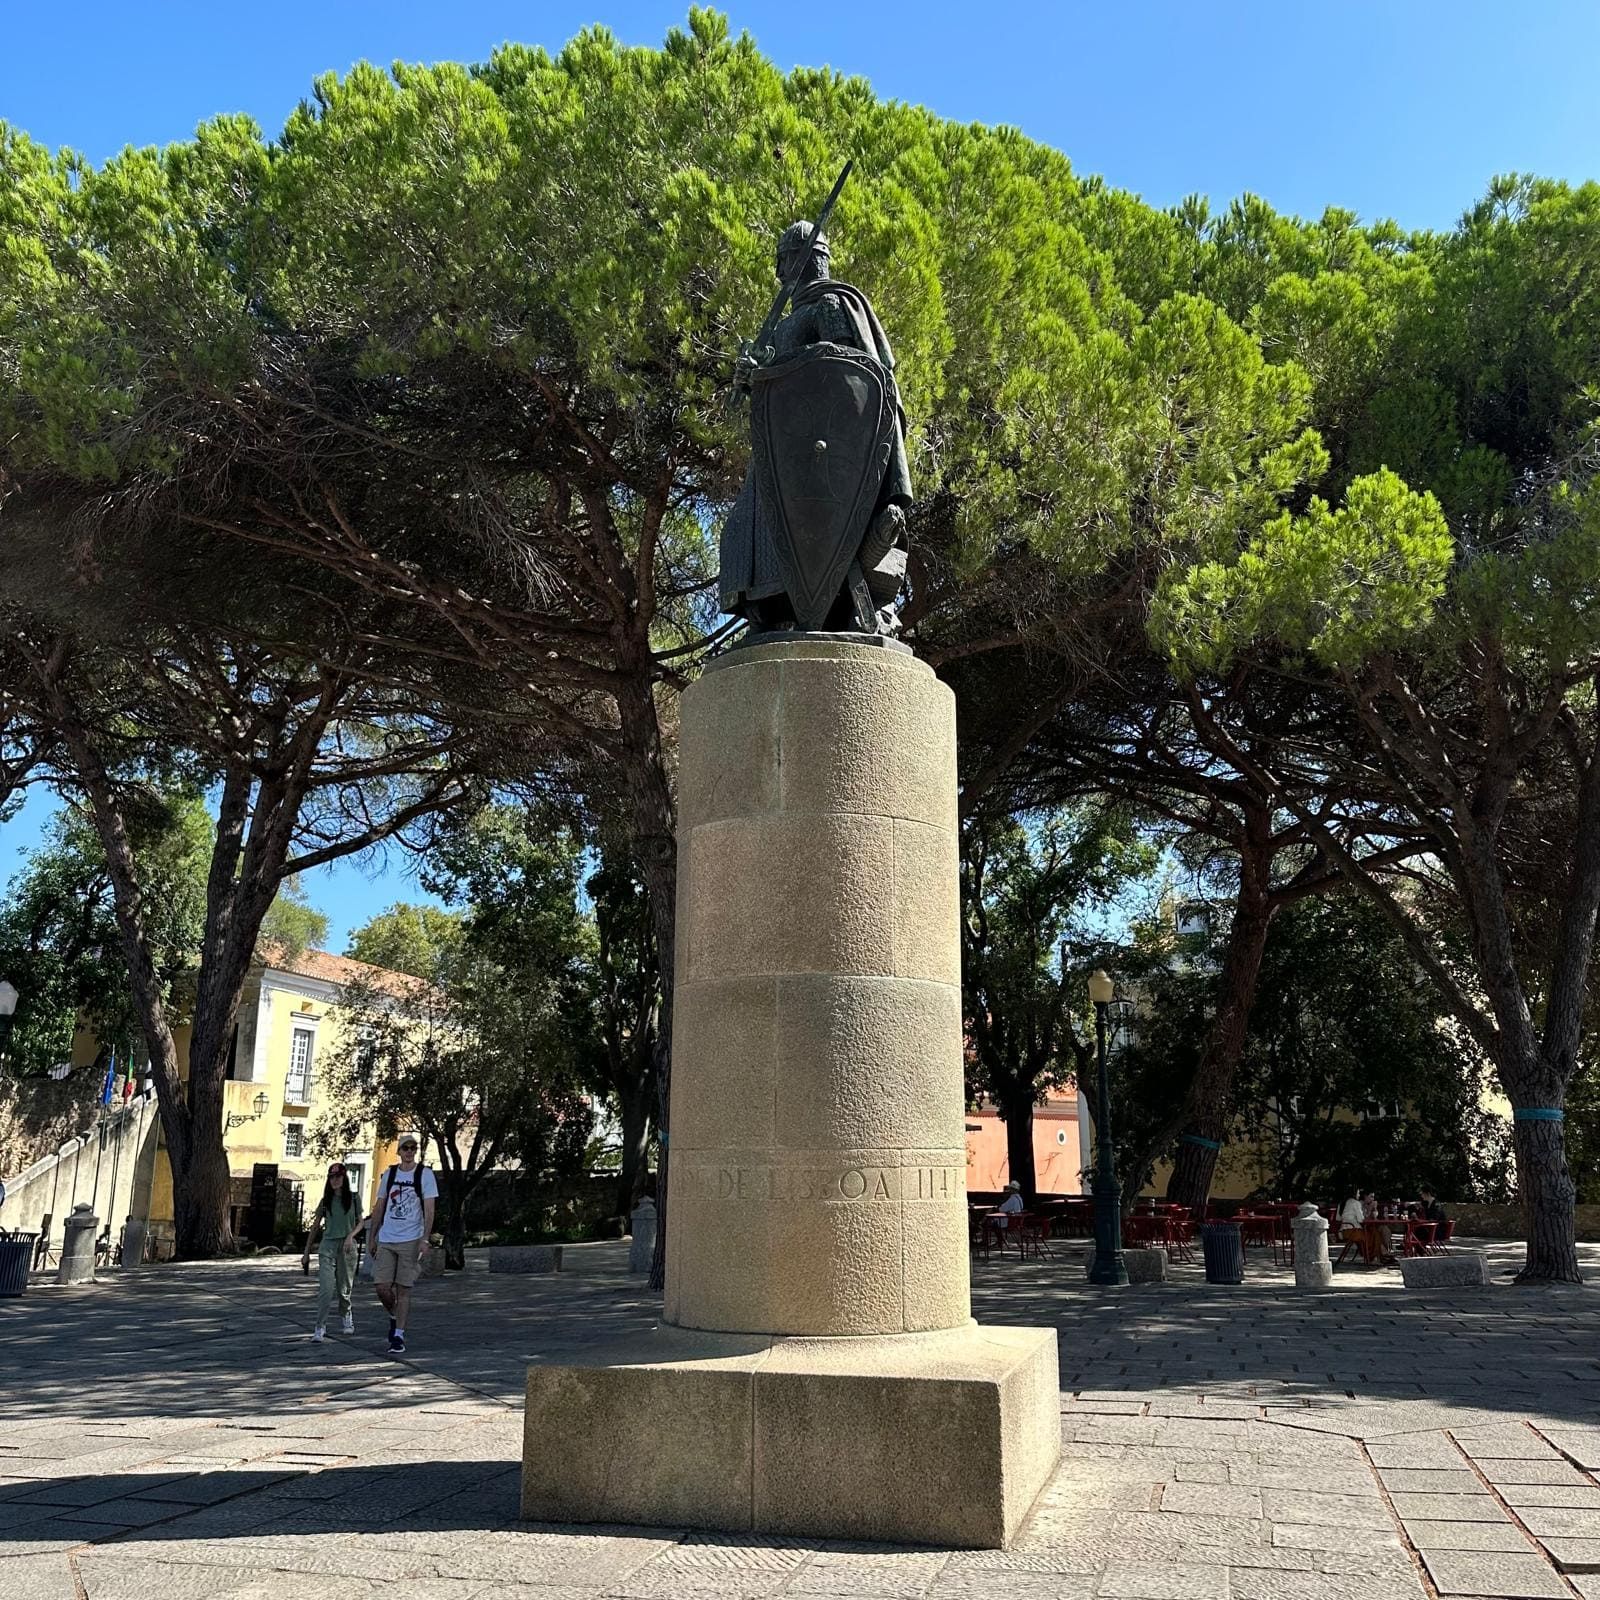
III – Place-of-Arms – statue of Afonso Henriques
Location: In the Place-of-Arms, turn towards the statue of Afonso Henriques
Afonso Henriques was the son of Henry of Burgundy and Theresa, Countess of Portugal, the illegitimate daughter of Afonso VI, King of León and Castile. Afonso Henriques’ father came to the Iberian Peninsula to fight in the “Peninsular Reconquest”, a process in which Christians attempted to recover territories from the Muslims. After marrying Theresa, Henry of Burgundy was given the title of Count of Portugal. The County of Portugal was a territory located in the north-west of the Iberian Peninsula, roughly corresponding to the north of Portugal, above the city of Coimbra. This is the context that Afonso Henriques was born into, although neither the date nor the place of his birth is known for certain. However, it is estimated that it was between 1107 and 1109 and, most probably, in the County of Portugal.
With the death of Henry of Burgundy, Theresa took over the rule of the County until the Battle of São Mamede in 1128, when she was defeated by her son and noblemen from the County.
As for when Portugal gained independence, historians have identified three possible dates:
The first is 1139 and the Battle of Ourique when, according to legend, Afonso Henriques defeated 5 Moorish kings, although it was more likely to have been a skirmish between small groups of knights, from which he emerged victorious. Following the battle, the soldiers proclaimed him Rex (the Latin word for King) and he would subsequently sign documents with this title.
Of course for a Castilian, such a signature would have absolutely worthless.The Second possible date is 1143. On 6 October of this year, Afonso VII, King of Leon, and his cousin Afonso Henriques met in Zamora. This meeting resulted in a peace agreement which put to an end the conflict between the two territories. Afonso VII recognised and granted the title Rex Portucalensis to Afonso Henriques.
Of course for a Frank this wouldn’t have meant anything.
Lastly there’s 1179 and The Papal Bull Bula Manifestis Probatum, signed on 23 May by Pope Alexander III, which recognised Afonso Henriques as the King of Portugal, as an independent Christian kingdom.Following this papal recognition, Portugal’s independence could no longer be called into question by any Castilians or Franks!
At the time, Coimbra was the most important city in the kingdom and it was from here that
the attacks were planned and the armies gathered. One of these offensives resulted in the conquests of Santarém and Lisbon from the Muslims.
It wasn’t until later, in 1255, during the reign of Afonso III, that Lisbon became the capital of the Kingdom and the monarch moved to the Palace of the Alcaçova, which is our next stop. -
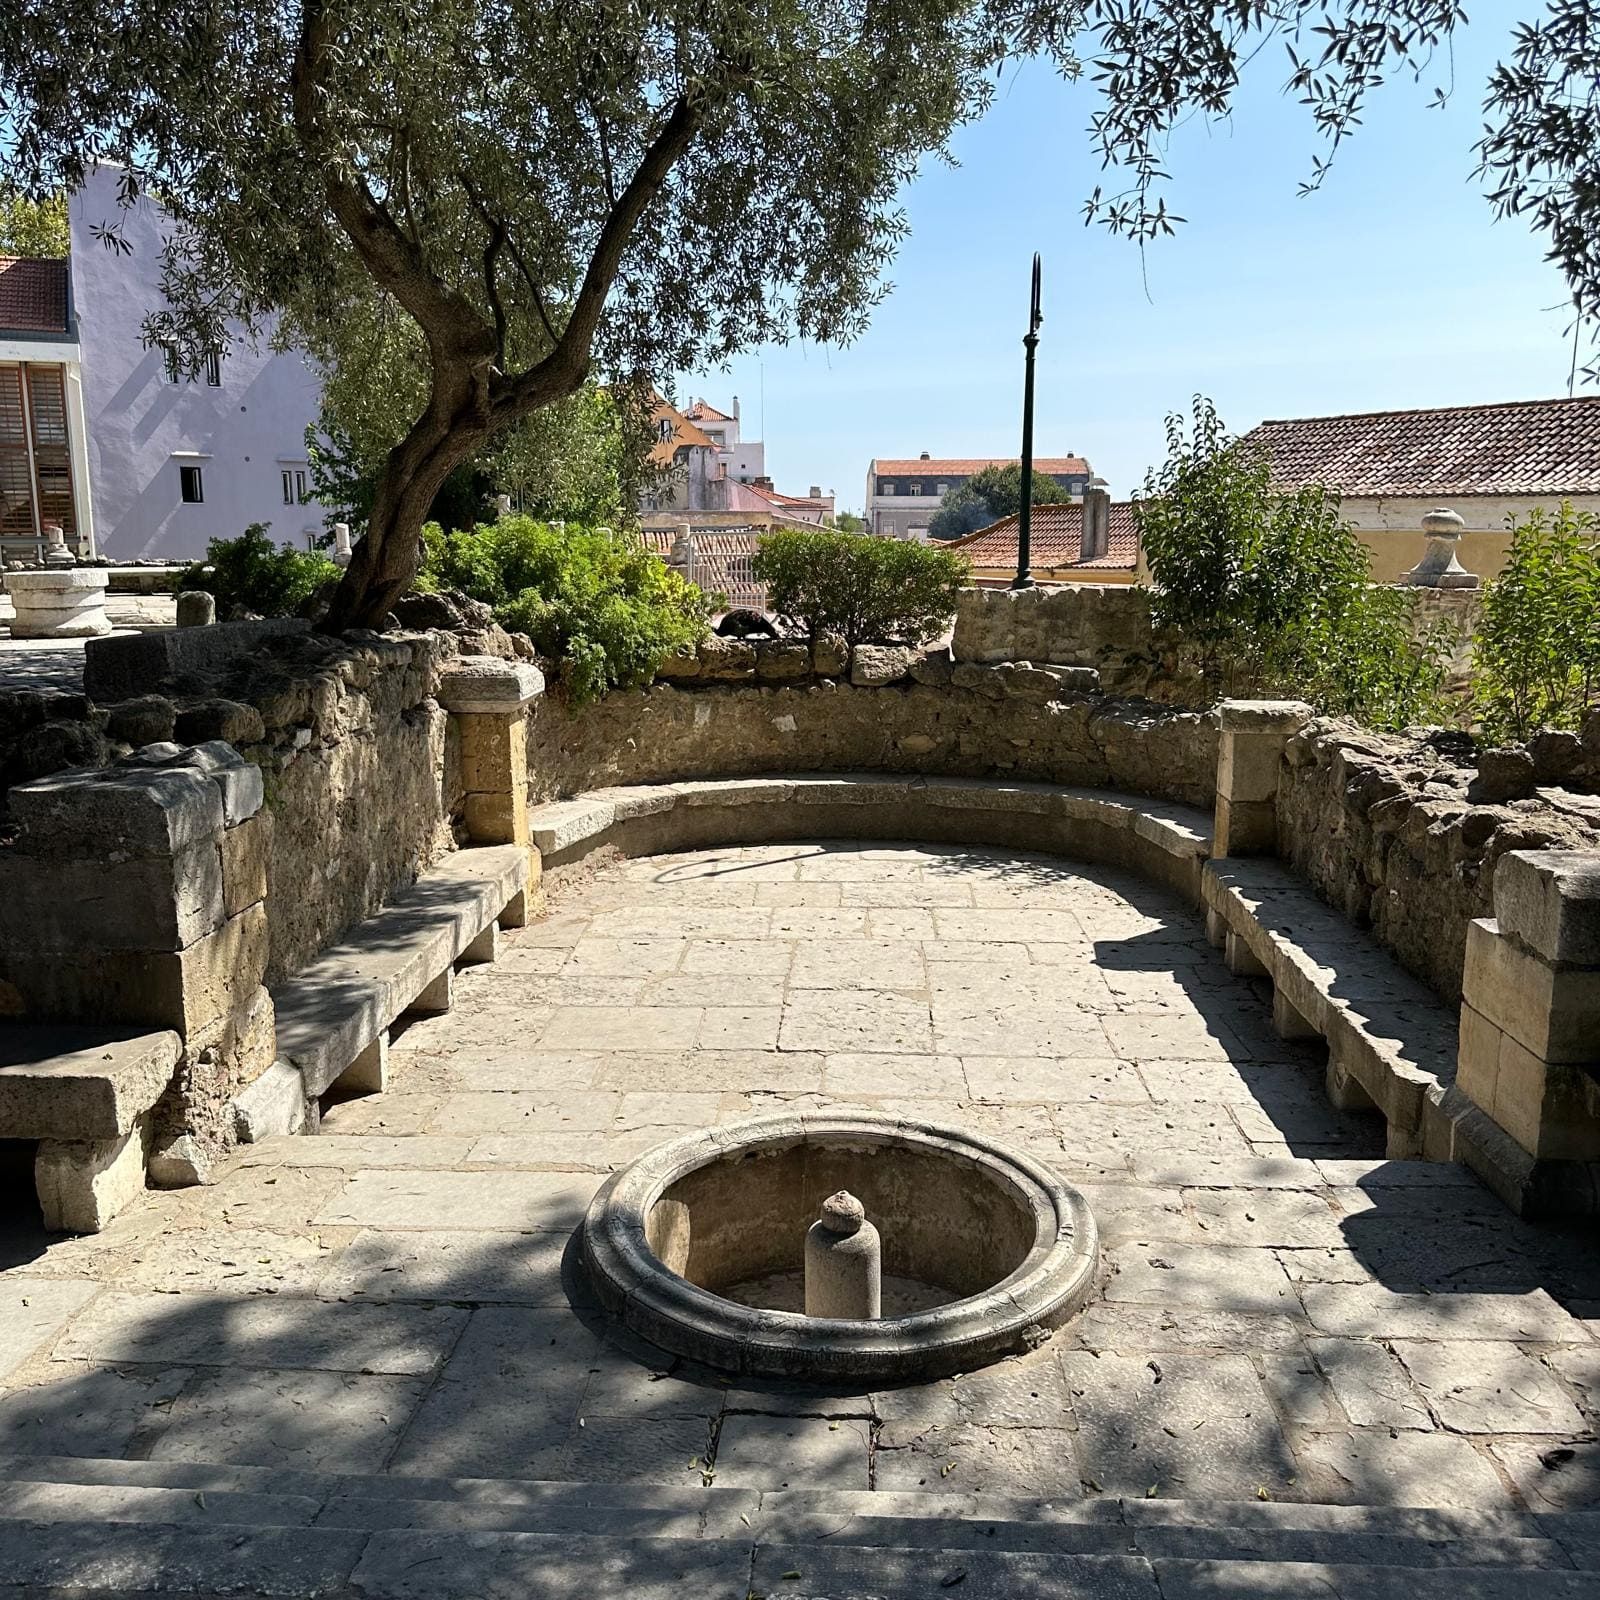
IV – Romantic Garden – close to the cisterns
Directions: climb the steps towards the garden
Location: stop in the garden, next to the cisterns.After conquering the Algarve in 1249, Afonso III realised that he needed a new residence to rule the entire kingdom. Lisbon was his first choice for a number of reasons: it was the largest city in the kingdom and one of the largest in the Iberian Peninsula; in geographical terms, it was approximately in the centre; it was also a prosperous city, and it had the imposing estuary of the River Tagus to the south, whose port was essential both for trade and military purposes.
The monarch needed an official and permanent residence, and the Palace of the Alcáçova was chosen. Records show that a series of building works were carried out during this period.
You might be wondering where the palace is now. Well, precisely where you’re standing. Mind-blowing, isn’t it? In reality, what you can see now is just the ruins of the old palace, which was destroyed, like so much of Lisbon, by a massive earthquake on the morning of 1 November 1755.
The residence of the city’s governor, known as the Alcaide, during the Islamic period is also believed to have been situated in this area, until the conquest of Lisbon in 1147. The Christian governors continued to reside here up until 1255, when Lisbon became the capital of the kingdom. It was only when the Palace of the Alcaçova was built that there would be an official residence for the king. This palace was the official residence of Portuguese monarchs until the end of the 16th century. Although King Manuel I moved to the newly built Ribeira Palace in 1505, the Palace of the Alcáçova maintained its status as a royal residence and was improved on several occasions throughout the 16th century.
In 1578, the tragic death of King Sebastian on the battlefield left the Portuguese throne vacant. A succession crisis ensued, paving the way for King Philip II of Spain to claim the Portuguese crown. Portugal and Spain fell under the rule of this monarch, a historical moment in history known as the Iberian Union. During this time, between 1580 and 1640, work was carried out on the castle grounds, including the Royal Palace of the Alcáçova, which was eventually transformed into a prison and barracks, roles it would keep until the 20th century.
From the 1930s onward, the Estado Novo, a dictatorial political regime, began restoration works at various Portuguese historical sites, under the auspices of the Directorate-General for National Buildings and Monuments, better known as the DGEMN. One of the monuments affected was the Castelo de São Jorge, as by this time the medieval fortification lay hidden amongst the walls of the barracks built there. In 1938, the DGEMN started a series of works, including the demolition of recent constructions and the expropriation of land, in order to rediscover Lisbon’s hidden medieval castle. These works restored the castle’s medieval appearance and reinstated it on the Lisbon landscape, erasing all trace of the barracks.
-
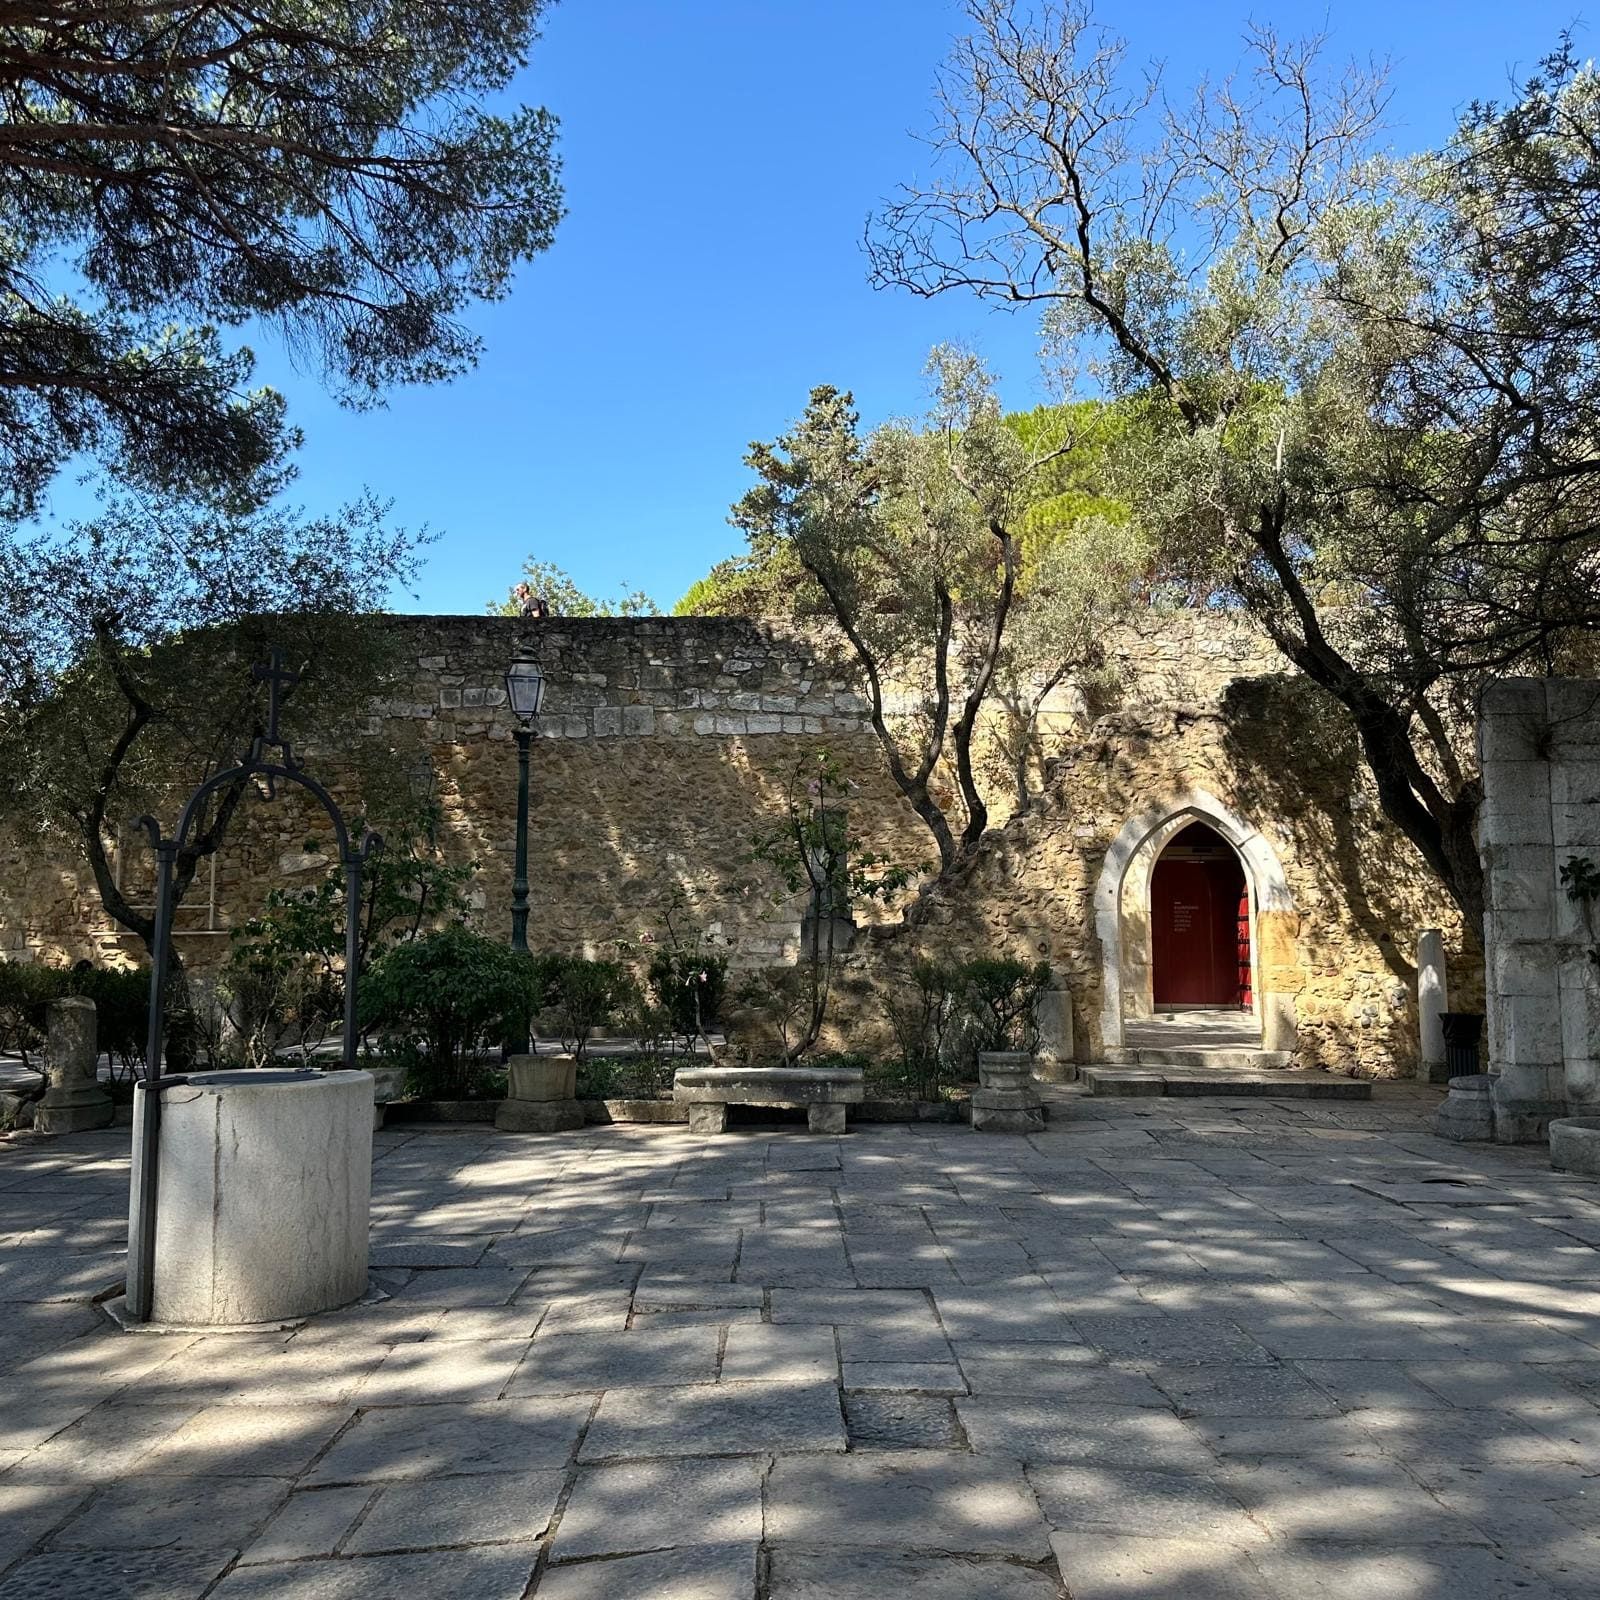
V – Ruins of the Chapel – apse
Directions: walk towards the ruins of the Chapel
Location: stop at the Chapel apseRecords first mention the existence of a Chapel dedicated to Saint Michael in the Royal Palace of the Alcáçova in 1299, during the reign of King Denis. This monarch was responsible for ensuring the presence of a permanent chaplain with the obligation to celebrate mass daily, even when the kings were absent. It was in this royal Chapel in 1502 that Gil Vicente’s first play (called “Act of the Visitation” or “Monologue of the Cowboy”) was staged, on the occasion of the baptism of the future king, John III. Today, only a few traces of the foundations of the apse and nave of the chapel remain. But in the 16th century, according to contemporary descriptions, it would have been a “good-sized”, sumptuously-decorated space, including a series of tapestries adorning the walls of the building. One of these would have depicted King Manuel I at a council. There was also a painting of Saint Michael the Archangel expelling Lucifer, described as a “masterpiece” by Cardinal Giovanni Battista Venturini, secretary to the Pope’s representative, who visited the Palace in 1571.
-
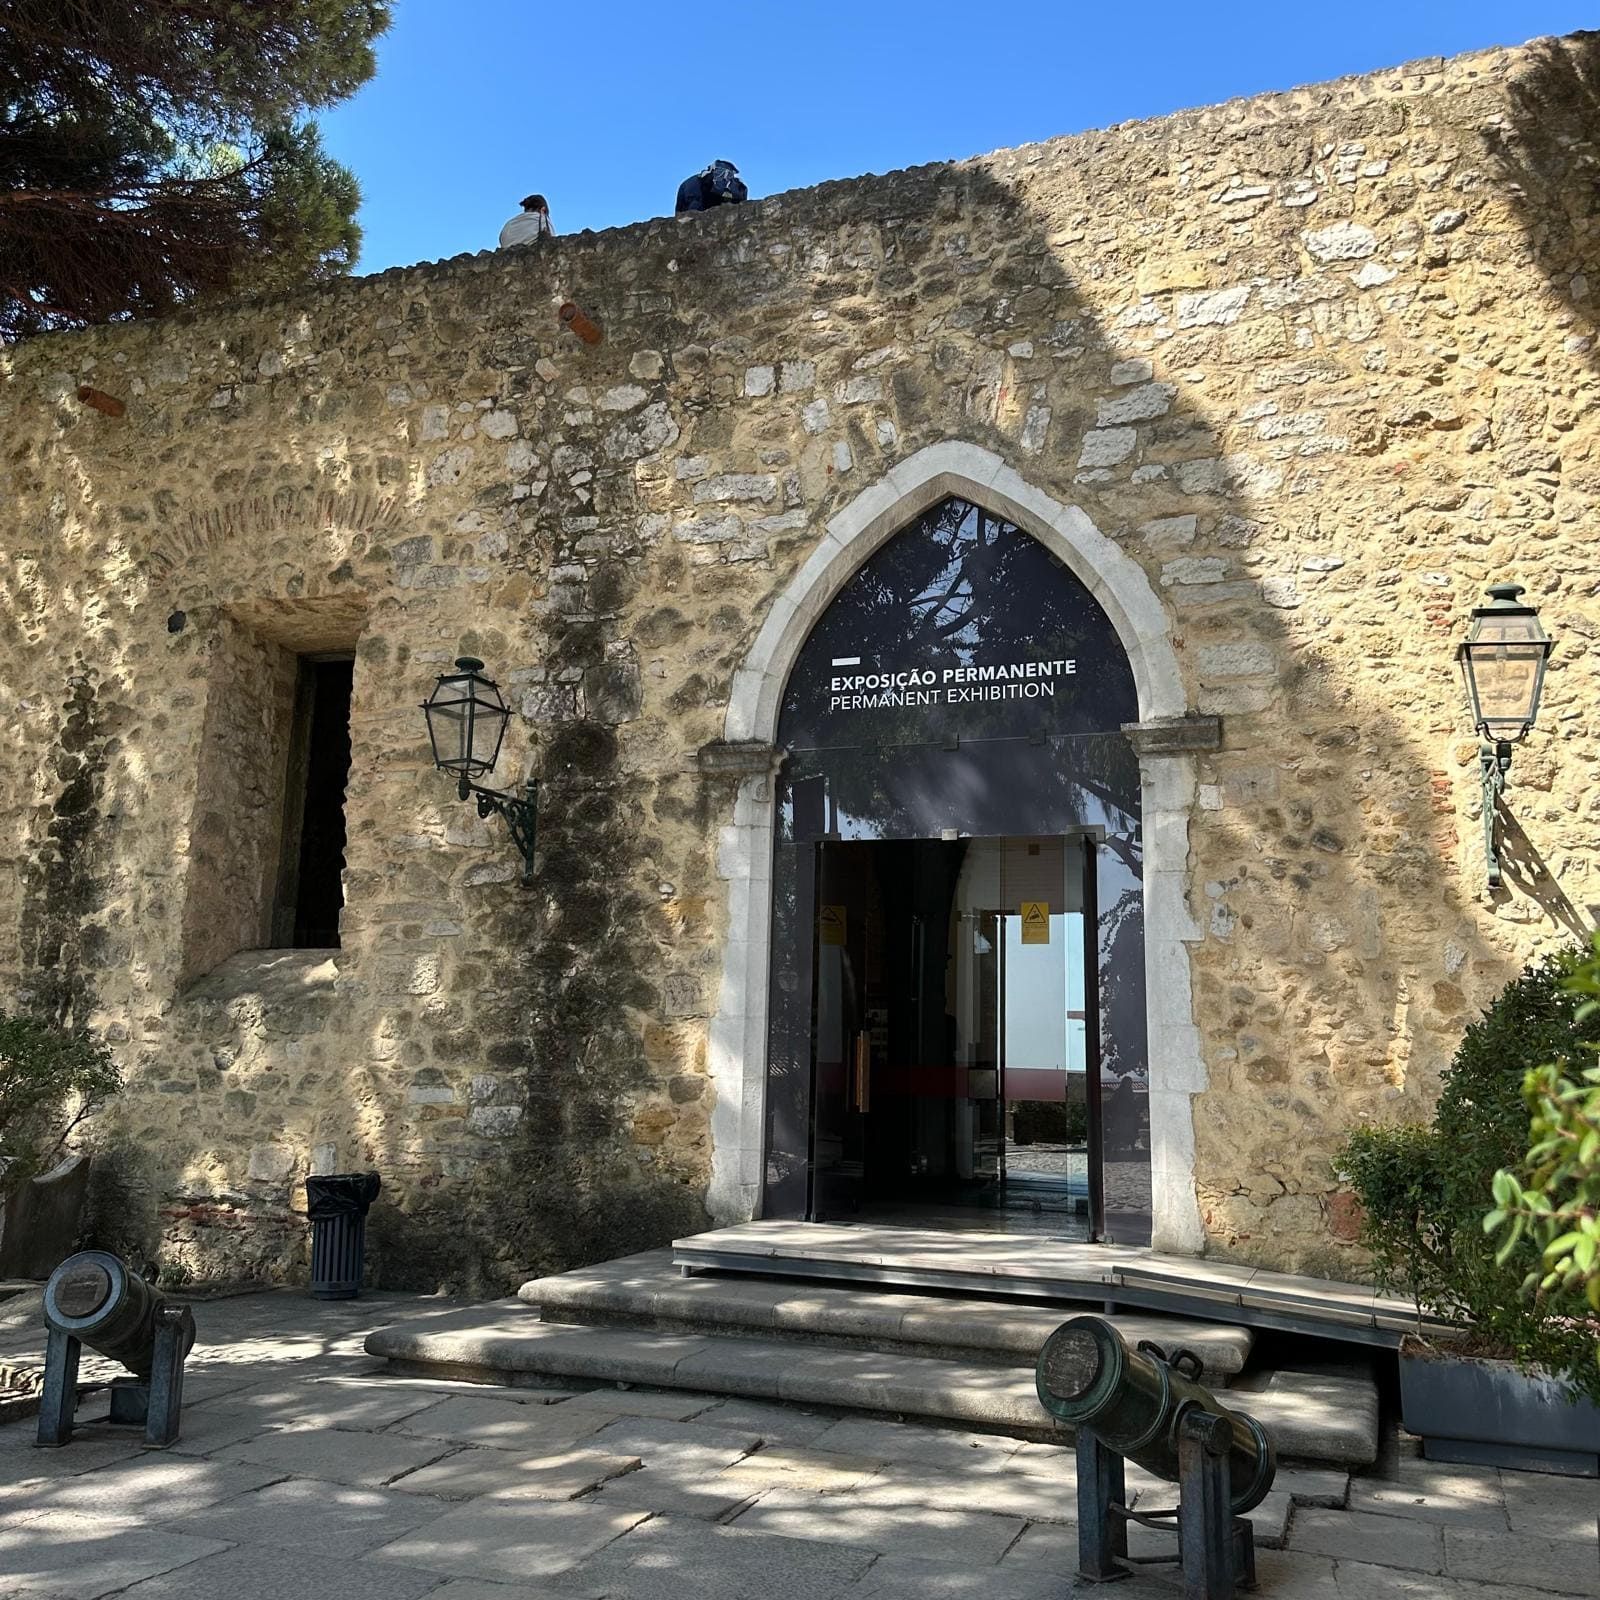
VI – Museum – entrance
Directions: head towards the museum entrance
Location: stop in front of the Museum entranceYou can no longer admire the grandeur of the Palace’s interiors, but trust Cardinal Venturini’s words and imagine a large building of at least two floors, with several chambers, antechambers, rooms, staircases and balconies. From the outside, this stone palace had “no particular architectural form whatsoever” in the eyes of this cardinal, and inside it was “more comfortable than showy”. Even so, there were Flemish tapestries decorating the interiors, as well as gold-embroidered fabrics, exotic furniture, gold and silver objects, walls covered with fabrics and painted ceilings.
At the end of the visit, we suggest you enter the Museum and discover the collection that includes artifacts found during various archaeological excavations. We also recommend taking a look at the depiction of Lisbon and the Royal Palace of the Alcáçova in our reproduction of the drawing Panorama of Lisbon, dating from the 16th century, which is exhibited in the Ogival Room, one of the rooms that was part of the royal residence.Well, seeing as we’ve talked about everything else, let’s finally see what brought you here in the first place: the Castle. Let’s talk about beheadings, embedded arrows, death in general and conquer the castle!
-
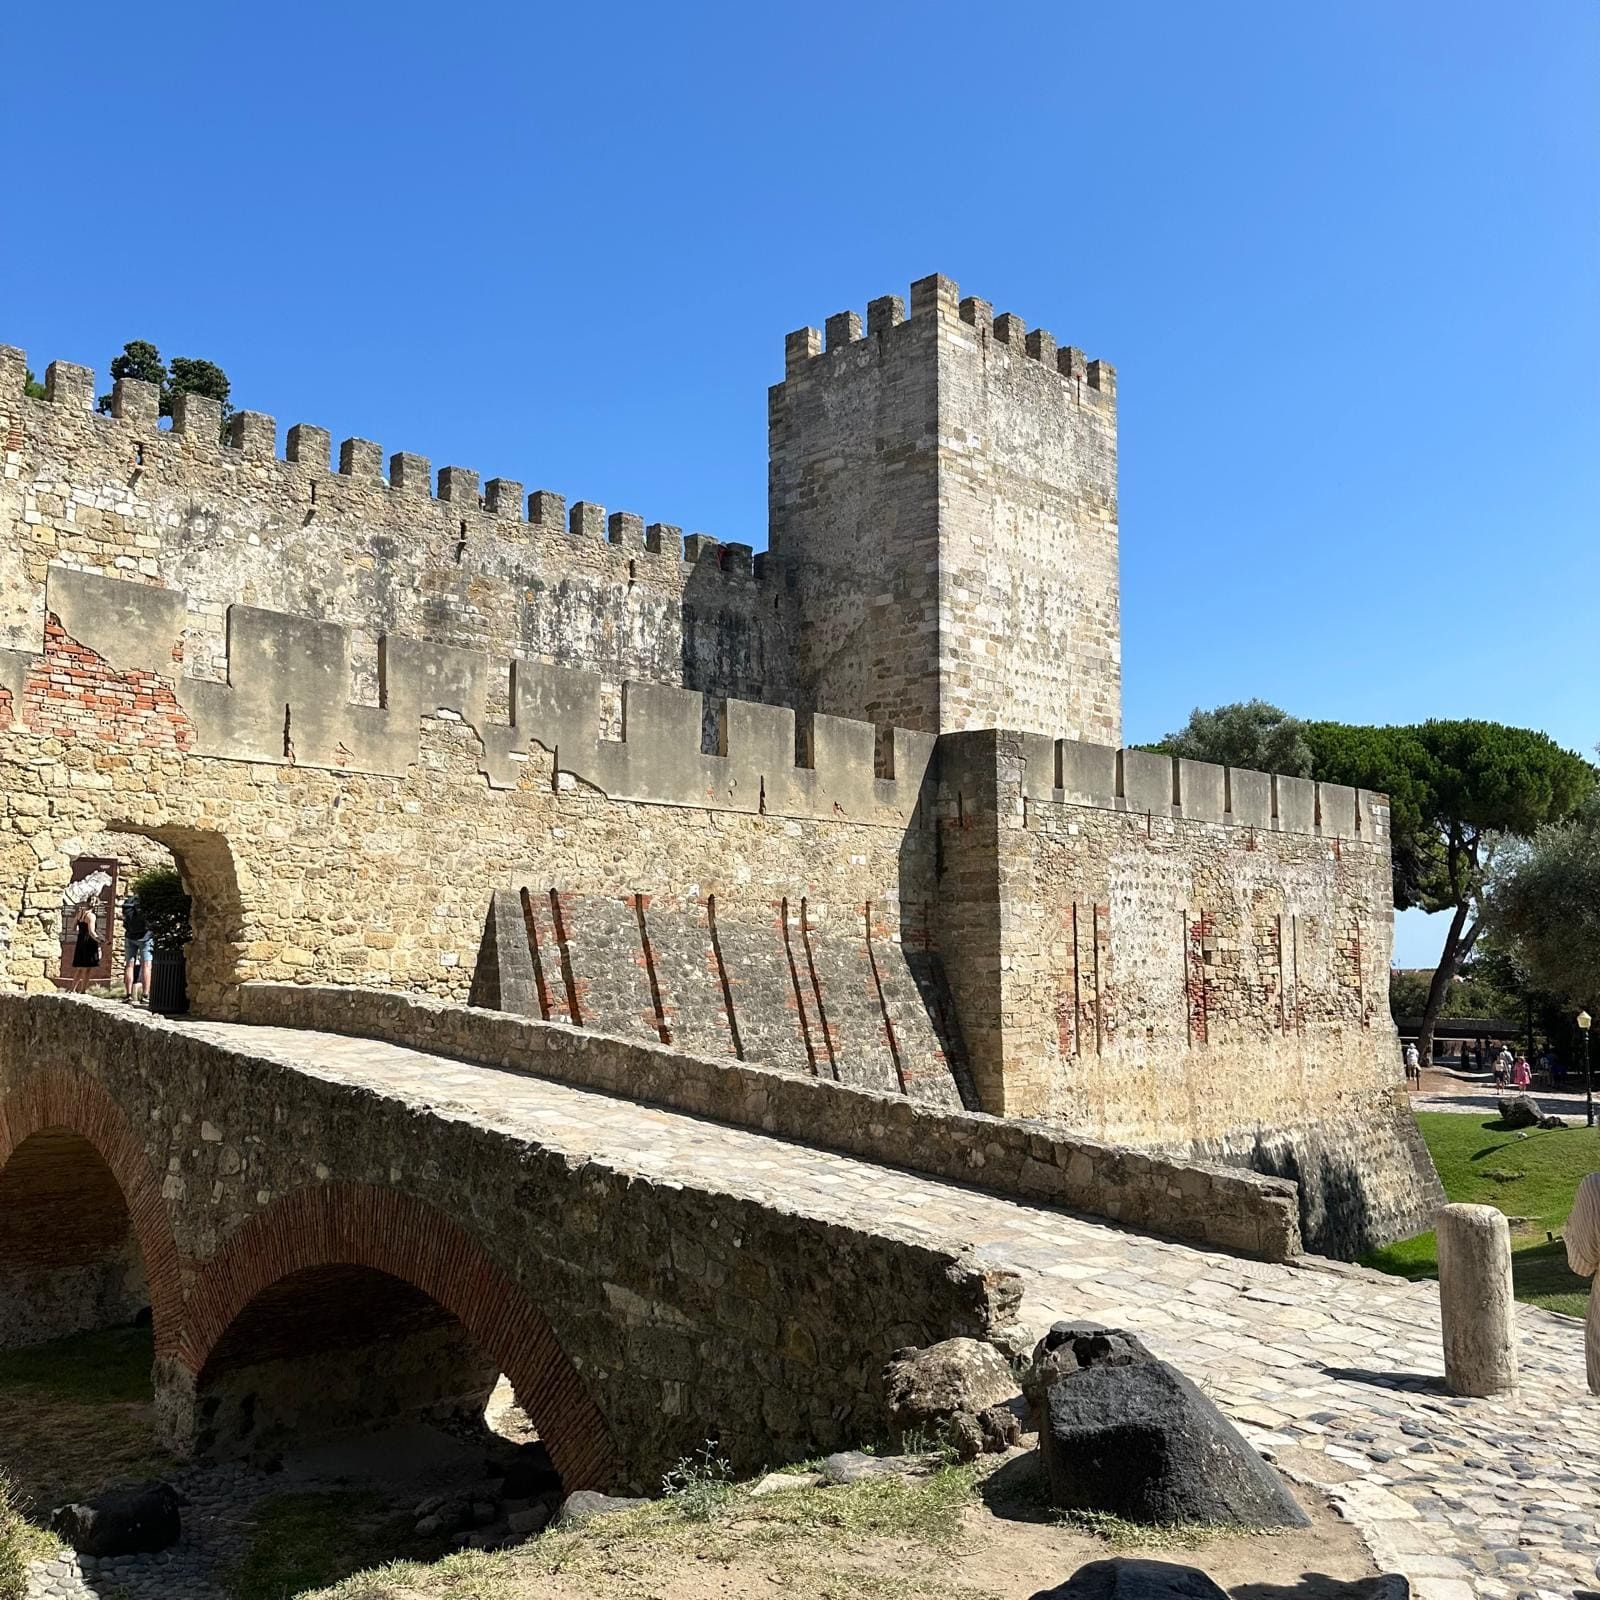
VII – Castle – stone bridge
Directions: walk towards the Castle
Location: stop in front of the stone bridgeFinally, our goal is within sight. Let’s take on the role of a soldier and try to conquer the Castelo de São Jorge.
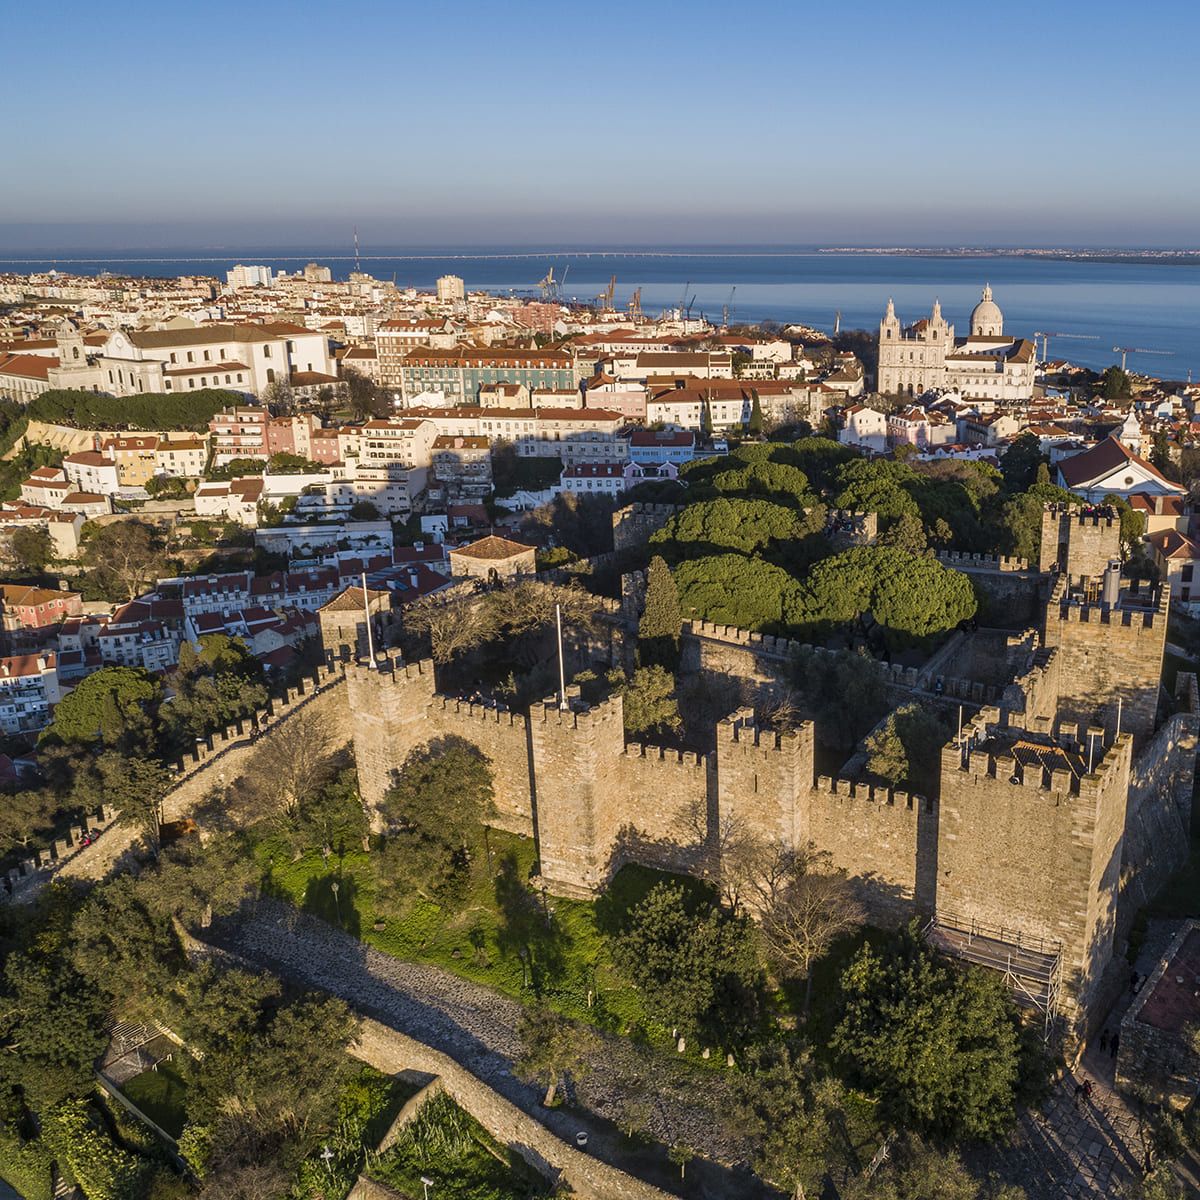
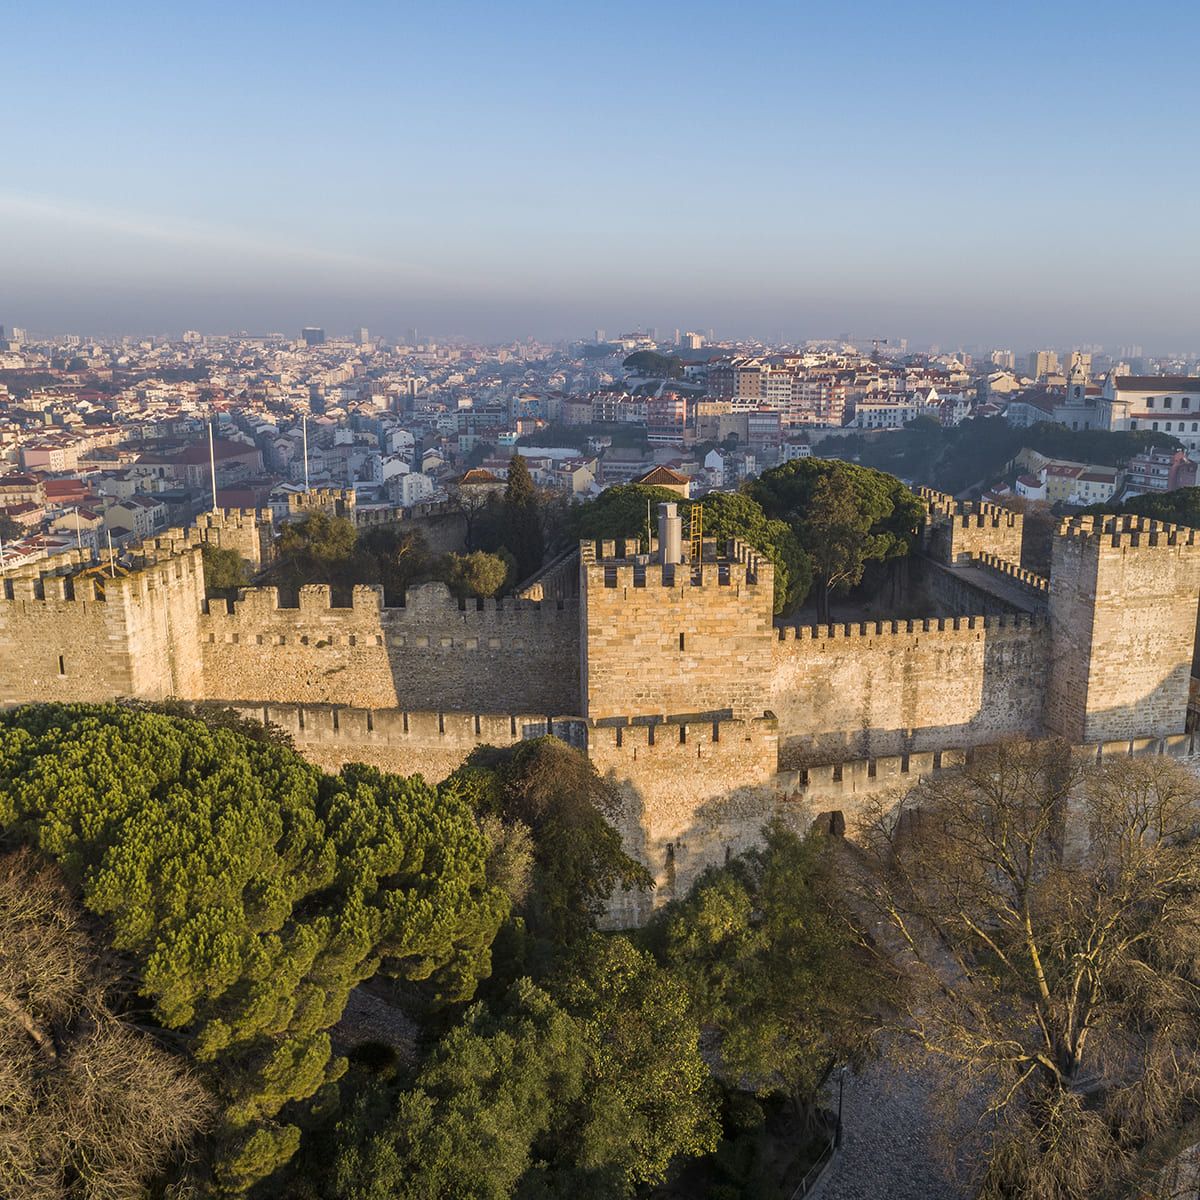
But wait, before we do that, we need to learn a few key facts about the castle! When was it actually built, anyway? Well, that’s a difficult question to answer. It seems that the first fortification was erected here in the 11th century, during the Islamic period. However, the castle we see today is the result of various modifications made over time. The current structure closely resembles a Gothic castle, probably the result of work carried out by King Afonso III and King Denis in the 13th and 14th centuries. Our castle features characteristics of fortifications of this period, such as its square shape, the wall flanked by several towers (in this case, 11 towers), the wide chemins de ronde (also known as wall-walks), the two places-of-arms inside the castle and the barbican with a moat. We’ll return to all of these during our visit.
Now we have everything we need! Let’s conquer the castle!
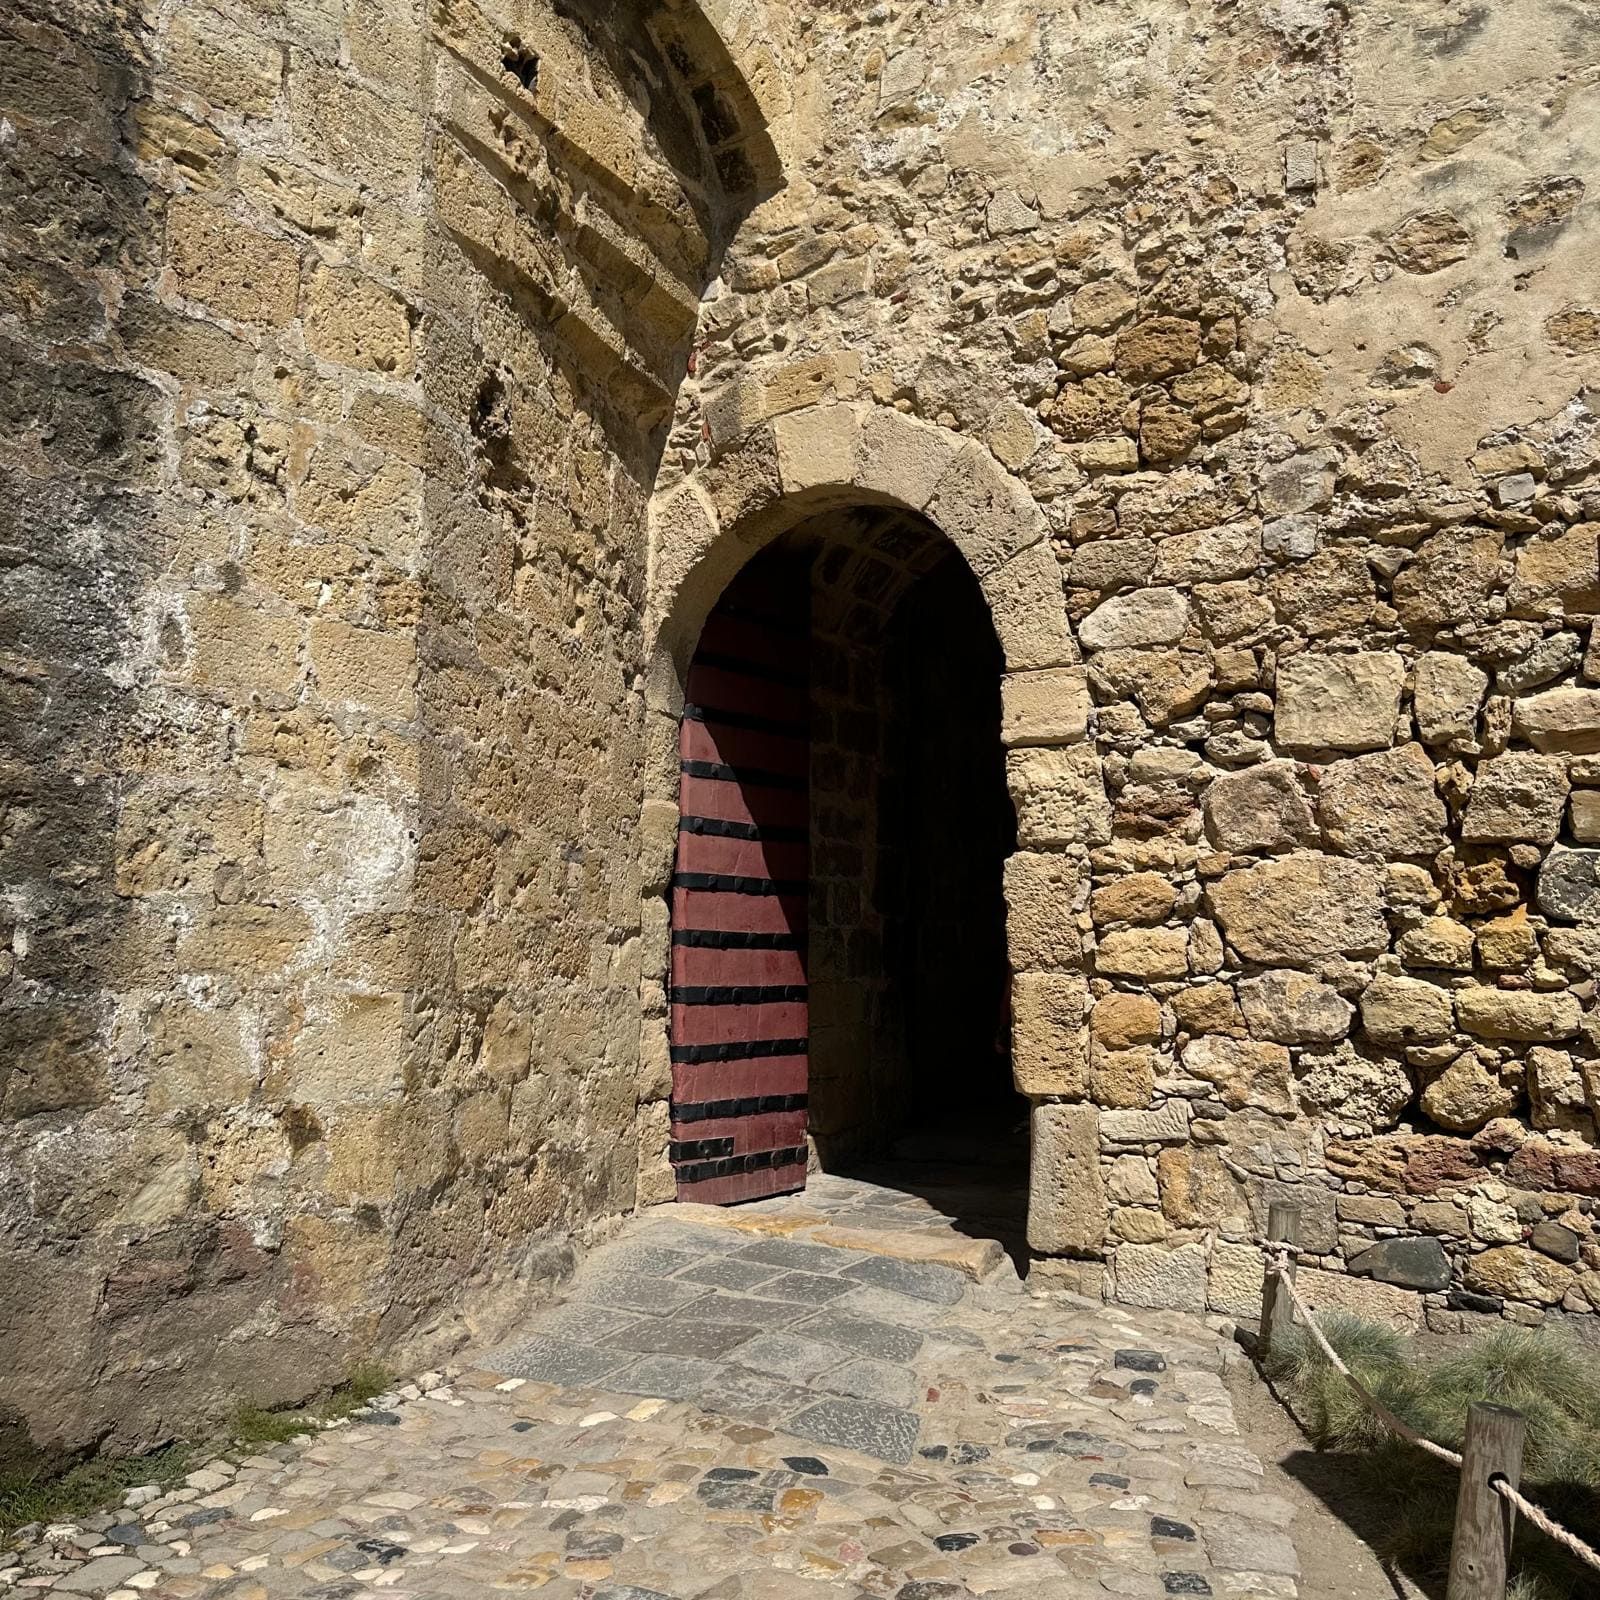
The first thing I ask is that you ignore the stone bridge and that hole in the wall. Many other castles had colossal entrances. At some of them you might find marble columns, paintings on the walls, statues or niches.
The Castelo de São Jorge works differently. We’re not going to see the magnificent entrances of Loire Valley castles, or the gigantic halls of German castles. The castle we’re visiting was essentially a defensive structure and never served as someone’s residence.However, there may have been a working space for the governor, just as the tower in front of you, known as the Torre do Tombo, functioned as a Royal Archive during the Middle Ages. The Castelo de São Jorge was never a palace and was only occupied in the event of imminent danger. That’s why there was no need to worry about a flashy, easy-to-spot entrance. On the contrary, at the Castelo de São Jorge, the entrance is hidden and discreet.
Note that our current position is not the best. We have before us three towers, the main wall, the low wall, also called the barbican, and along it we can see a series of arrows slits. There are four levels from which archers and crossbowmen could target us.I ask you now to look to your left and right and, without thinking too much, to choose a path.
The path to the left, if you’re facing the castle, provides a significant positional advantage for the attacker. You can see that the path rises slightly. From a strategic standpoint, a higher position always gives an advantage to those who occupy it. If we choose the path to the right, we can see that the descent is steep, and we will position ourselves increasingly lower in relation to the walls and towers.
Fortunately, any military tactics book will cover what to do when confronted with such a choice. When there is no obvious choice between two paths, we should never send all our forces to one side or the other. In other words, as the saying goes, “divide and rule.” The main objective of not having an easily identifiable entrance is to force the attacker to divide their forces. Imagine that we have an army of 10,000 soldiers with us, a substantial army for the time. Here, 5000 would go to the left and the remaining 5000 to the right.
The path to the left, despite its positional advantage, would lead us to a slope, with no chance of finding the entrance to the castle. So, what are our options?
We could try to climb the walls or go underneath by digging tunnels, or we could try to destroy the wall or, perhaps the most appealing to us today, look for an entrance. Let’s start with the ropes and ladders. It works incredibly well in the movies. The hooks always latch on first time, and the attackers climb the ladders without a care in the world, ignoring those who’d be defending the castle and the weight of the armour and weapons they’d be carrying.This approach doesn’t always work. On one hand, climbing a rope is never easy, especially with the extra weight we’d be carrying; on the other hand, defenders can easily repel the attack, whether it be with arrows and crossbow bolts, stones thrown down, or simply by cutting the ropes or burning the ladders. Our best chance, if we were to try to climb the walls, would be to catch the soldiers off guard. And, of course, our chances of catching the defenders by surprise were slim.
Trying to dig tunnels was another option, but this took a lot of time. And there was always the risk of someone doing the same, but from the inside out, or of the tunnel collapsing. To make matters worse, the low wall thickens at its base, a feature known as an alambor, which makes the foundation of the barbican even wider and more resistant.Worse still, there’s a moat in front of the wall. We’re used to seeing castles with water-filled moats. In people’s imaginations, there are crocodiles swimming in them ready to eat anyone who approaches the water. The Castelo de São Jorge has a moat, but the purpose for which it was dug might come as a surprise.
We’ll be taking the route on the right, so take a few minutes to think what might be waiting for us in the moat.
-
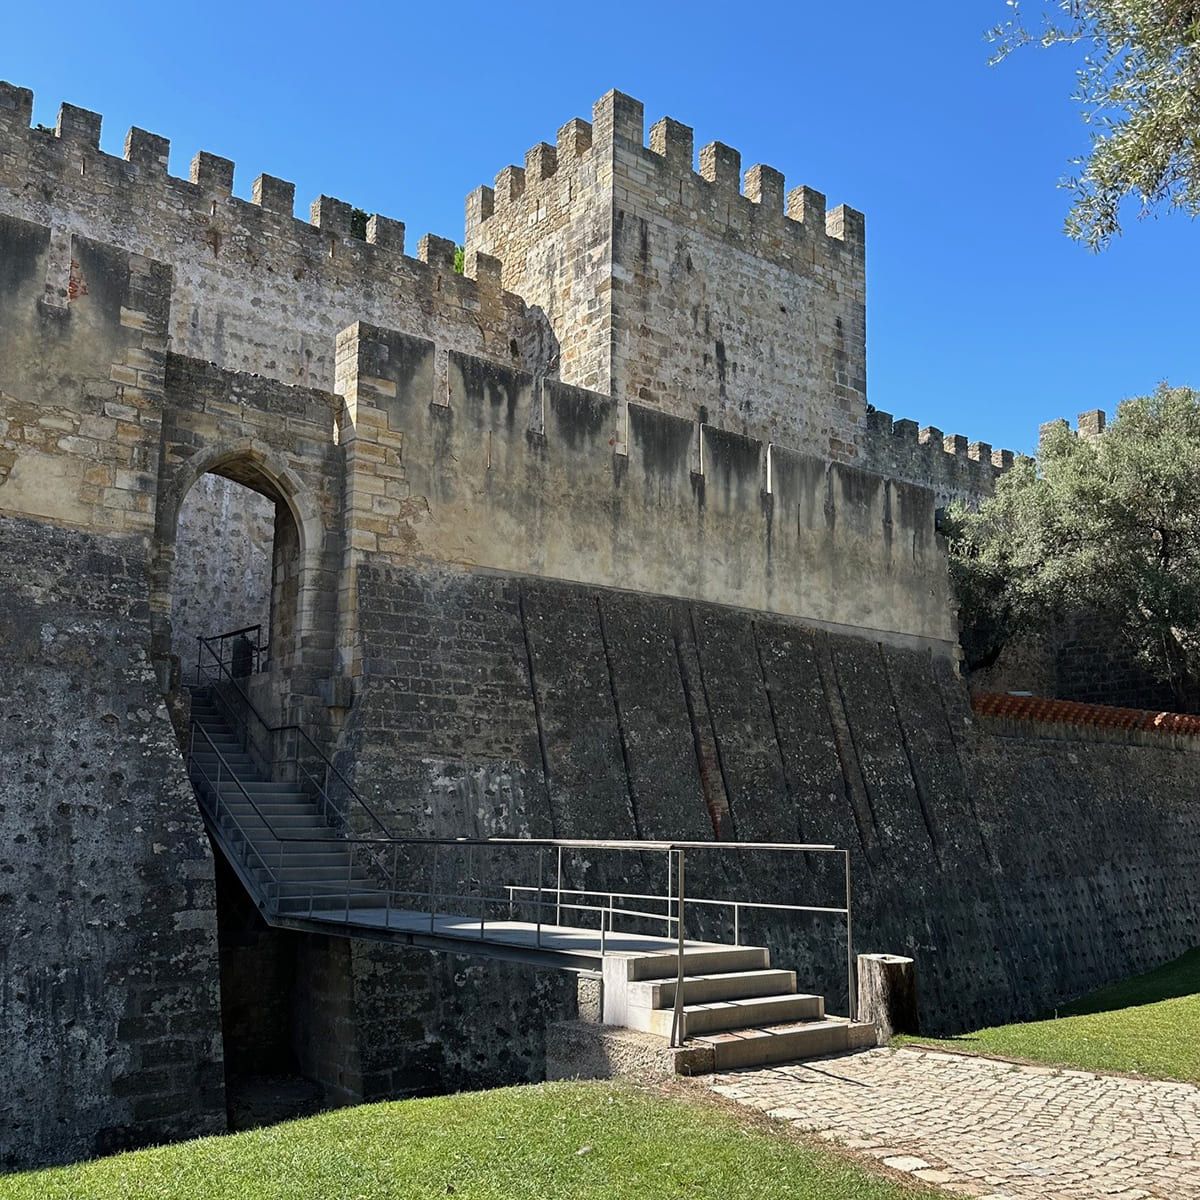
VIII – Castle – iron bridge
Directions: walk to the right and make your way around the castle
Location: stop in front of the iron bridgeTake a good look at the tower to your left, which will be our target for today. It seems that this may have been the keep at the Castelo de São Jorge. This tower might have been the last bastion of defence, and where the standard, flag or other symbol of authority would have been found. In order to capture the fortress officially, and ultimately the whole city, we’d need to get to the top, take down the flag and finally hoist our own.
The entrance to the castle would have been in front of us. In medieval times, there would have been a drawbridge that, in times of war, could be raised, to prevent enemies from entering.
As for the moat, do you have any idea what it would have been like?Moats with water are more common in areas with frequent rainfall and/or lower areas with nearby watercourses. Here, we do not meet any of these conditions. Let’s exercise our imaginations: instead of a moat with water, in front of us would have been the place where all the waste from the defenders of the castle was deposited. The smell, revulsion and, most importantly, the risk of diseases being spread would have been high.
We’ve already tried to go over and under the wall, so all that’s left is to try to destroy a part of it or force the gates open. The most commonly used weapon in medieval times to breach walls or gates was the battering ram. Nowadays, the police also use this same weapon. In medieval times, the battering ram was a wooden log, sharpened at one end or with a head resembling that of an animal, usually a ram, made of bronze or iron, which soldiers swung back and forth to repetitively strike the same point until it was breached.
Unfortunately for us, this castle was designed to prevent the effective use of the battering ram. The presence of a moat made it impossible to get close to the gate with a battering ram.
We could try to use a battering ram to strike at the same level as the barbican, but once again, the moat hinders our approach. The use of a movable wooden tower, known as a siege tower, would be practically impossible to position close enough to the wall to allow soldiers to gain access.
Moats weren’t dug to drown soldiers, although this might have happened. Their main function was to make it as difficult as possible for attackers to get siege weapons close to the castle walls.
Other siege weapons we could use include catapults and trebuchets. In films, these weapons always hit the target and destroy it as if it were made of cardboard.
In reality, catapults and trebuchets were very difficult to use effectively.
When using a catapult, we have to take into account the distance between our position and the target. The size of the projectile, its weight, its shape, the direction and speed of the wind, the humidity of the air, the material the ropes are made of and the tension applied on them make it difficult to use with this type of weapon with accuracy.In fact, using stones against this wall would have been a huge waste of resources. In some cases, catapults and trebuchets were used to launch other things: bodies, whole or cut up, healthy or decomposing, were actual ammunition. The goal here was not to destroy walls or kill anyone; catapults and trebuchets were also weapons of psychological and biological warfare.
If we put ourselves in the shoes of someone defending the castle and found ourselves in this position, our morale would inevitably be shaken. The objective of this psychological warfare is to encourage some of the defenders to surrender. It is very challenging for anyone who has been bombarded for hours, days, or sometimes even weeks, not to consider surrender, however fleetingly.
-

IX – Castle – entrance bench
Directions: climb the steps of the iron bridge, go across and stop at the top
Location: entrance benchNow that we’re actually inside the castle, we can see that our entry to the next stage is neither inviting nor beautiful. What it lacks in decoration, it makes up for in the brilliance of its design from a defensive point of view. As we cross the threshold of the doorway, we are confronted with the castle’s main wall in front of us. We haven’t entered the castle after all; our search for the castle entrance continues.
We are in a very narrow space, and this lack of space is even more noticeable when there are large groups of people here. The entrance is designed to force the attacker to make a choice – hopefully the wrong one. At first glance, we again seem to have a 50/50 choice between the left and right paths. You might think that, being among the first to enter, we have the luxury of a little time to think about which way to go, but we don’t. Not only could enemy shooters stationed at the top of the towers and the main wall fire straight down on us, but our own companions could also pose a real danger. If the soldier in front dallied too long while trying to figure out the best course of action, he’d have to be hurried along.
Returning to our choice, have a look to the left and the right. Does either way look an easier option? Once again, it’s not an obvious decision.Note that the left path is shorter and becomes increasingly narrow as you make your way along it. While we have to walk less to reach the end of it, not so many soldiers can come with us. To the right, it’s the opposite; not only can we see that it is longer, but it also widens as we go. We can take more soldiers with us, and as there’s more space, it’s likely that the entrance is somewhere in the wall on this side. Without any further information, we would be tempted to follow the right path, but there are more factors to be consider.
Most of the world’s population is right-handed and the chances of having any left-handed soldiers in a medieval Christian army were slim. With this in mind, many traps and vantage points were set up to nullify any advantage that right-handed swordsmen might have had.
On this basis, let’s assume that all 5000 soldiers who crossed the bridge with us are right-handed and carry their weapon in their right hand and their shield on their left arm. If we take the right-hand path, we can lift up our shields to protect our heads from almost anything thrown at us. If, on the other hand, we take the left path, our right flank is completely exposed, as our sword would offer little protection.
All things considered, the right side offers a clear advantage, but if we take into account the principle followed earlier, we should split the group into two. I would choose to go in the left group.
Those who chose to take the more logical path and went to the right would soon discover it was a dead-end and their tour of the castle would be over.In our imagination, we might think that all the defenders would be pouring large cauldrons of boiling water or oil on the heads of those desperately trying to escape below. In reality, the castle didn’t have an abundance of water, and oil was too expensive to waste in this way. In some cases, something different was used. Something in almost unlimited supply on planet Earth, which you can almost always get for free, which can bring you good vibes and happy memories, and which everyone has touched or seen: sand. Sand boiled in cauldrons over the fire, that is.
Why is it that sand could be so devastating in this context? Well, imagine looking up and seeing where the enemy shooters are positioned. A glowing grain of sand can easily cause serious eye damage. If you were wearing a chainmail shirt, the sand would slip through the gaps between the rings. If you were wearing closed armour, the heat from the sand would be transferred to the metal protecting you. The same goes for metal helmets. All the metal that protected you from enemy projectiles would cause you to get cooked inside your own armour. Do you know how many films show sand being used in this way? None. Now you know how to defend your house for free. -
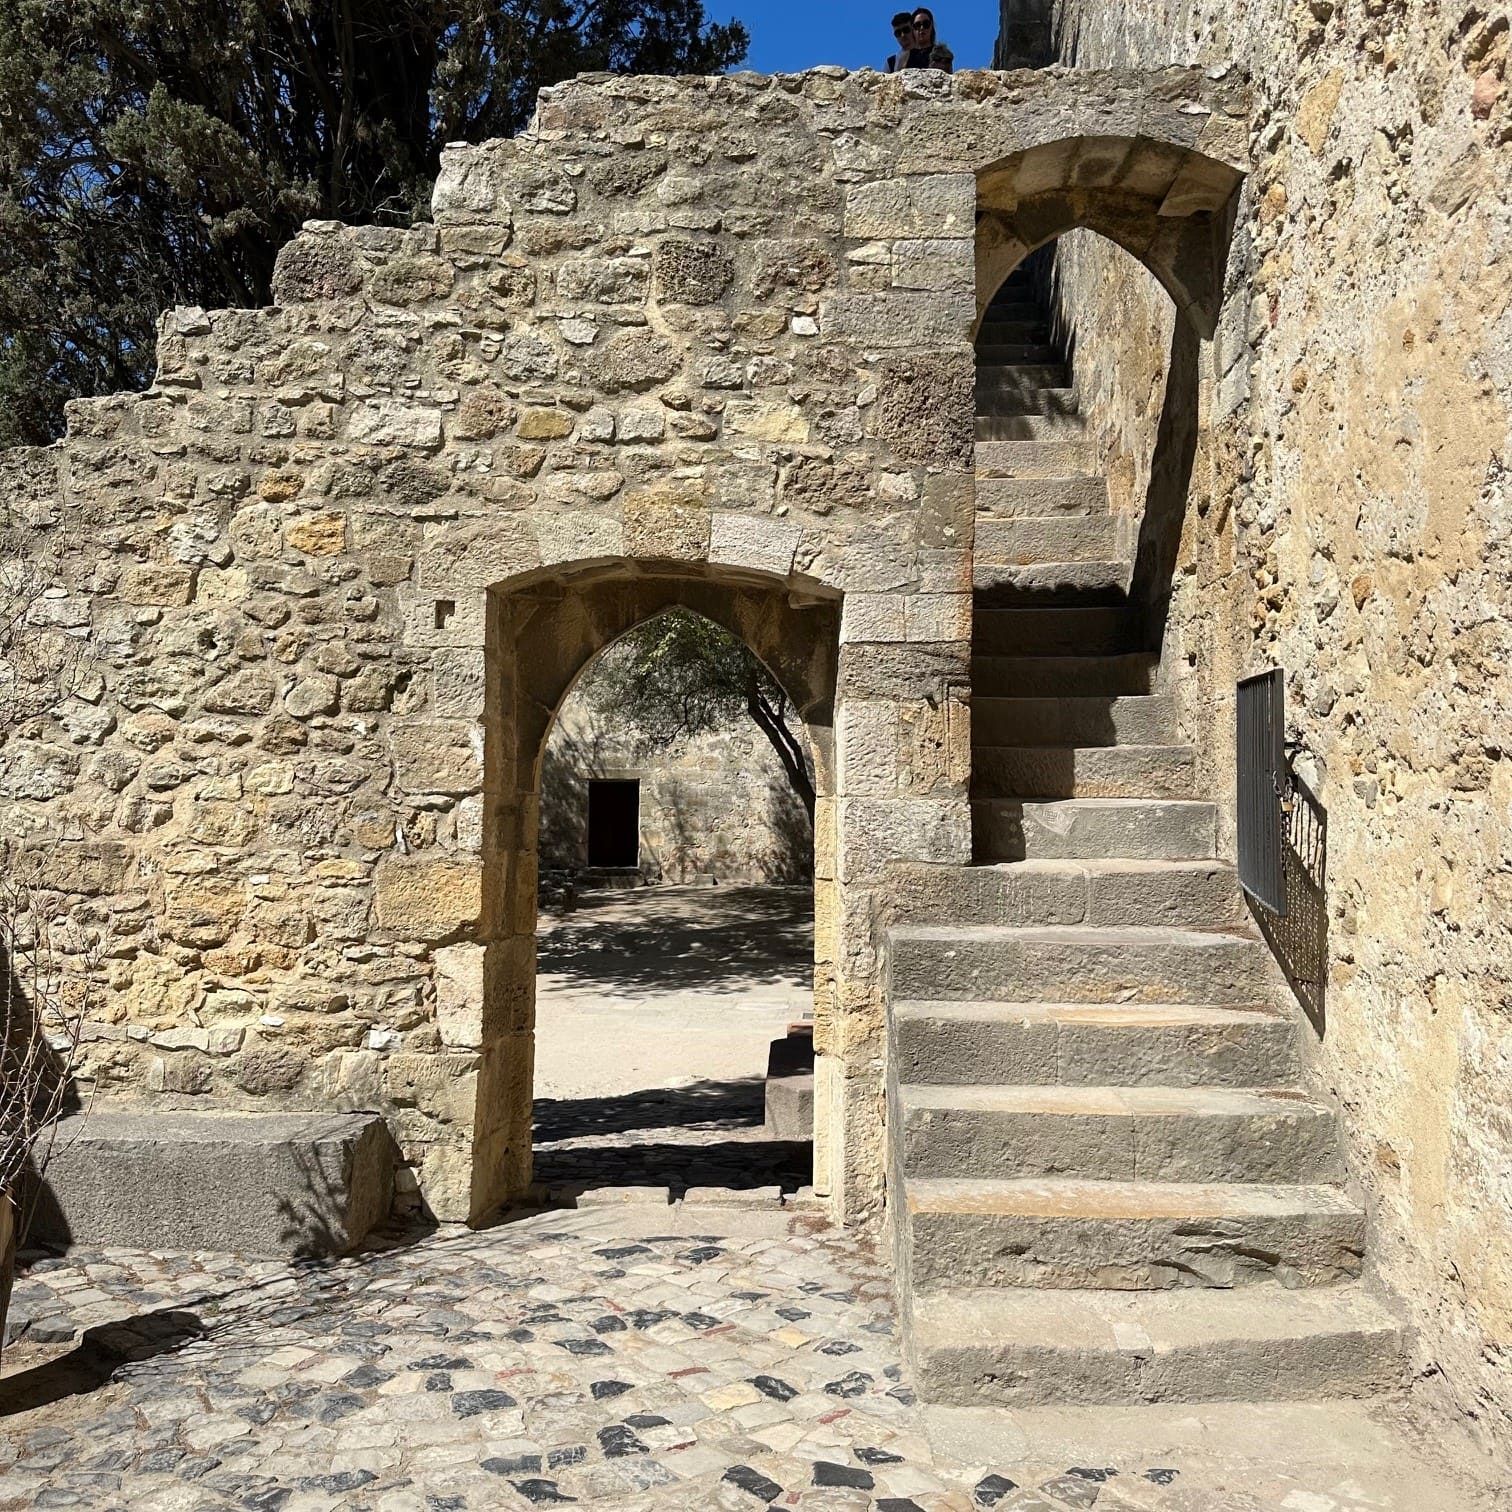
X – Castle – between the walls in front of the gateway
Directions: walk to your right, follow the wall on the right and stop in front of the gateway
Location: between the walls in front of the gatewayHaving reached this point, nowadays you have a map of the fortress in front of you, so take the opportunity to memorise it or take a photo in case you need it later. As you can see, it would have been much simpler if we had just crossed the stone bridge (and saved several minutes of this audio), but it wouldn’t have existed. And although it might seem like it, we’re not actually inside the fortress yet.
In front of us stands a huge door that, in times of conflict, would have been closed. You’re probably thinking: “how would we break down a barrier like this? With a battering-ram?” Well, the battering-ram is outside the castle. Retrieving it would mean retreating, trying to get it between the walls, through the elbow-shaped passageway, and bringing it here. All while projectiles rain down on our heads from above.
Even if we managed such a feat, remember that the castle is built to make every step forward nearly impossible. Look closely at the tower to your left. Its angled construction prevents the use of the battering-ram front on. In other words, the only possible way to use it would be diagonally, resulting in much less impact. So, pick up whatever you have to hand – axes, stones, swords – whatever it takes until you manage to knock down the gate, under a constant rain of projectiles.
Let’s imagine that we’ve finally managed to break down the gate. If you thought you were safe now, the first sight you’d see would be two arrowslits, and you’d be greeted with a shower of arrows and crossbow bolts. So raise your shields, take cover and let’s find out what awaits us next.
-
XI – Castle – entrance
Directions: walk through the gateway and turn left
Location: stop in front of the entranceWelcome to an area that any attacker would want to avoid at all costs. If you look around you, you’ll see we’re on low ground surrounded by high walls. You can imagine that crossbowmen and archers would make life miserable for anyone who had to defend themselves from this position. Down here, overlooked from all angles, there’s nowhere to hide. Our only option as attackers would be to break down the gate as quickly as possible and move forward.
We can see that there used to be a gateway here from the holes in the walls on either side, which would have held the thick wooden beams securing the door. To the left, you can see another opening which was made when the castle was used as barracks. As it wouldn’t have existed in the medieval period, we can pretend it’s not there!
At first glance our position might not seem that great, but it’s about to get a lot worse, because once again, from in front of the gate, we can see that the wall drops away. What is the purpose of this wall?
Well, the fact that this wall becomes more prominent as it gets closer to the gateway means that once again there is little or no room for siege weapons, especially the battering ram, to be manoeuvred.
Although this floor was laid in a much more recent period of the castle’s history and is therefore not the original one, we can see that it is sloping. Some castles were concerned not only with the physical defence of their spaces, as we saw with the tower, but also with the morale of the soldiers.
If you imagine that we still have with us the 2,500 soldiers who chose the right paths, this space doesn’t have enough room for all of them at the same time. Once again the group would be split up, although this time there would be no choice involved. We can imagine that 50 to 60 soldiers might fit here and the rest would still be in the previous area. Until they manage to turn the corner of the tower, these soldiers can’t see what they’ll very soon be facing. The 90º angle of the tower prevents visual communication between the groups.
While the soldiers attempting to breach the door are being slaughtered, the rest of the army cannot see it happening. What do you think would have happened to the bodies of the soldiers who were killed or too wounded to continue the fight? They would probably remain here until the end of the day’s battle. The ground isn’t sloped enough to make a body roll on its own. The problem lies in the blood that these bodies would shed, which, due to the gentle slope of the ground, would constantly flow towards the soldiers waiting behind the tower.
These soldiers would have smelt the blood flowing in their direction and heard the screams of their comrades fighting and being massacred, but wouldn’t have known what was actually going on.
You might dismiss all of this as barbaric violence that doesn’t apply to the modern day. However, when we watch a horror film, in many cases the worst part of the film isn’t when the monster or spirit reveals itself. It’s knowing that there’s something lurking in the darkness that we can’t see or identify. The anticipation of the moment makes our imagination play tricks on us. This area achieves exactly that effect by combining a physical trap with a psychological trap.
-
XII – Castle – First Place-of-Arms
Directions: walk through the gateway, continue straight ahead while listening and then turn left
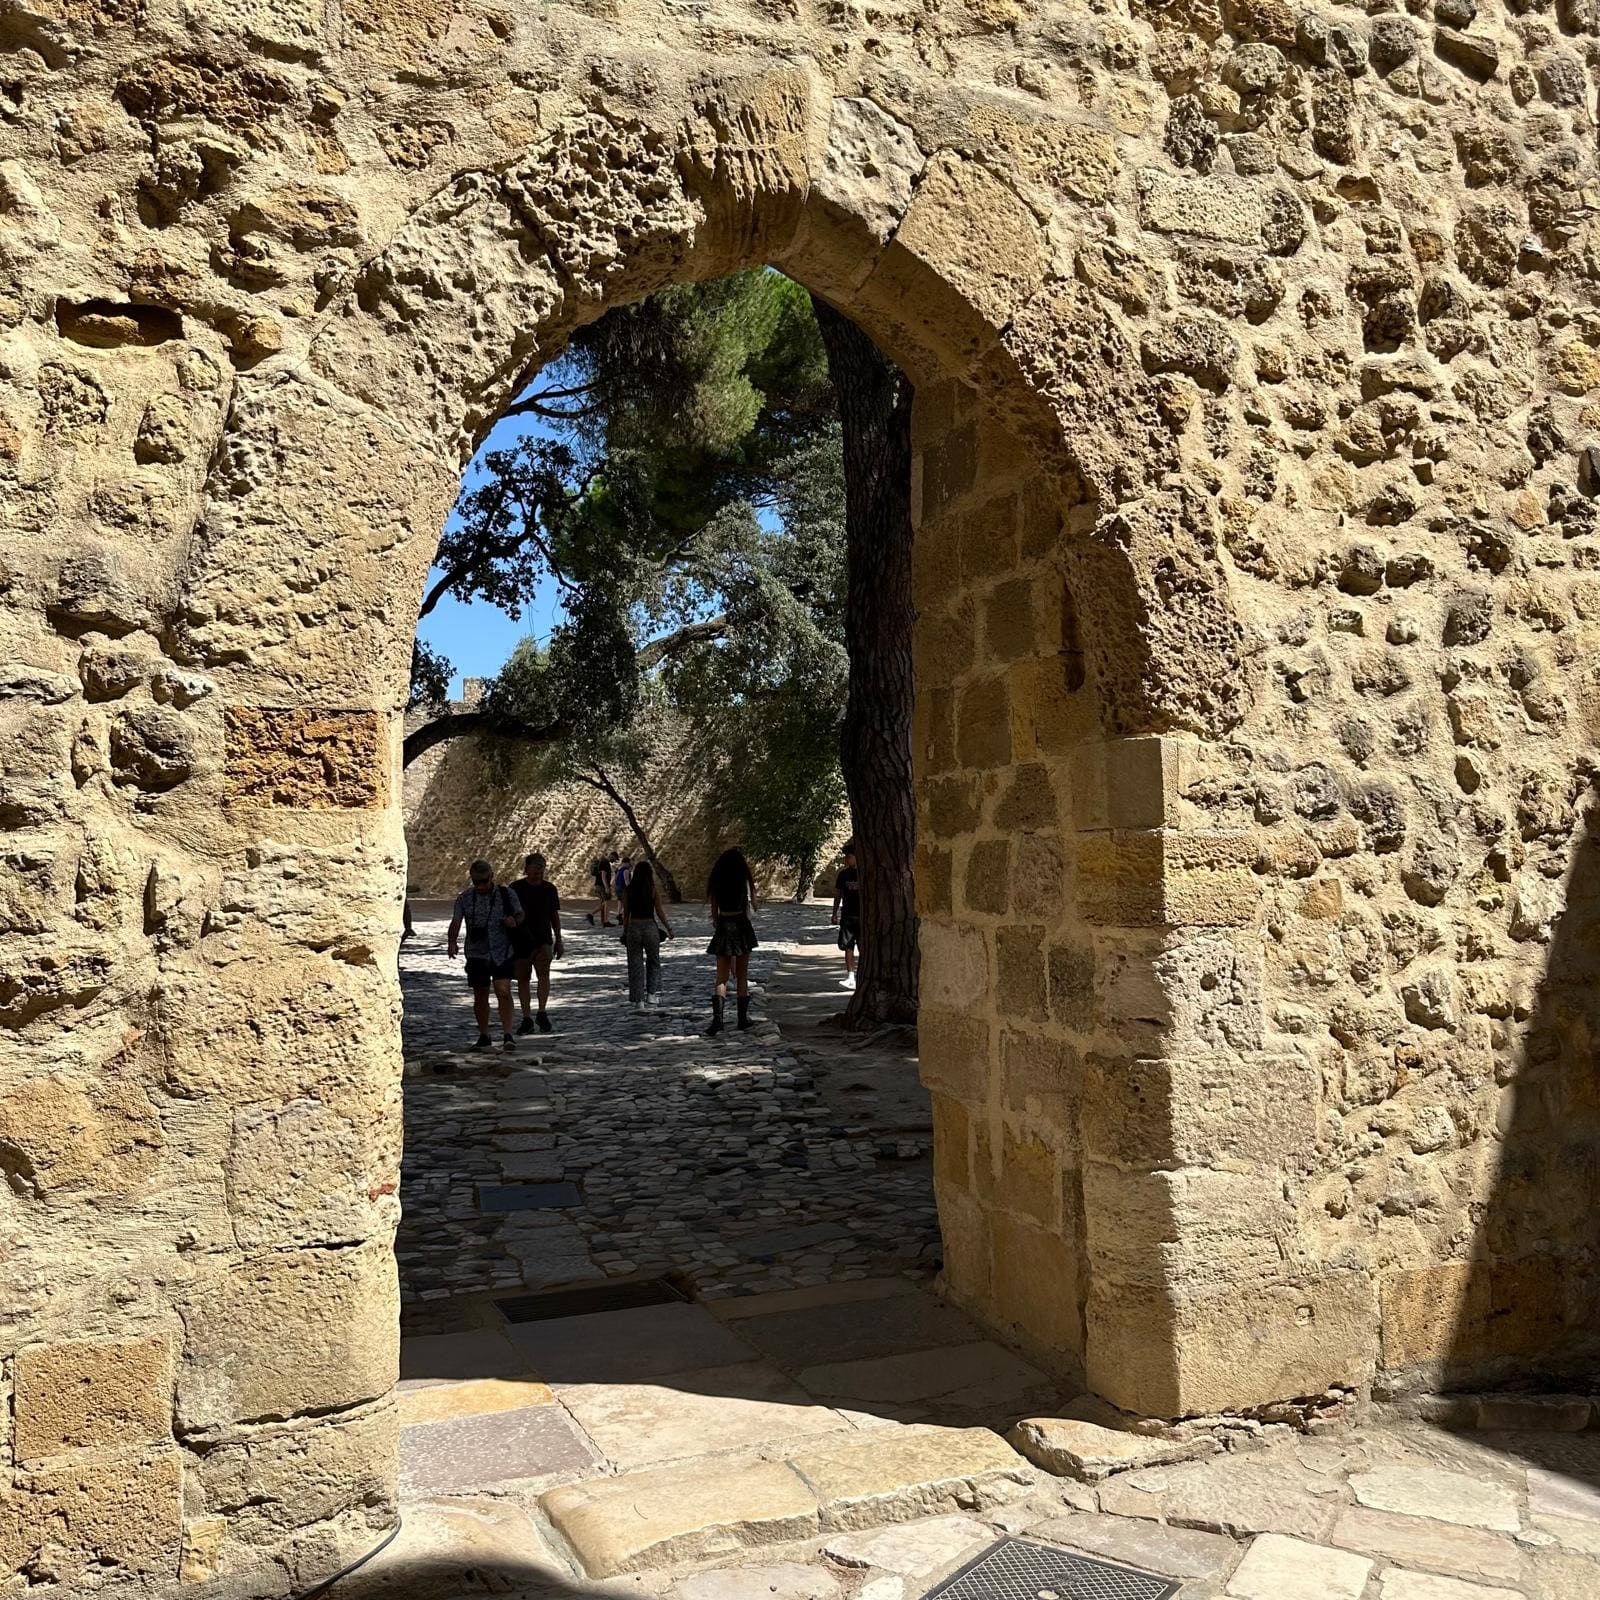
We’re finally through the door and can relax a little. We have more room to gather around with our comrades and a chance to plan our next move. However, this sense of security is unfounded. As you can see, we are still surrounded on all sides and, when you consider that the steps to the right, the trees and that small storage structure next to the walls wouldn’t have existed, we also have no way of getting up to the top of the walls.
We’ve already seen how ropes and ladders are no guarantee of success and this time we don’t have a 50/50 choice. In fact, we have no choice at all. This low-lying area surrounded by high walls seems to have no way out.
In the middle of the wall to our left, you can see that there is a tower. Unlike the other towers, whose functions are well known, this one is a bit of a puzzle. In terms of defensive position, it initially seems to add little. However, it is thanks to this tower that the door to the most restricted area of the castle is concealed. For once, the only way forward is not to choose left or right, but to go straight ahead.
Behind the tower we can see where a door once stood and, behind the arch, we can once again see holes in the wall, which would have held the wooden beams that locked the gate shut. I have one more trap to show you, and this one can be dangerous, even today.
-
XIII – Castle – Second Place-of-Arms
Directions: walk through the door and stop in the second square
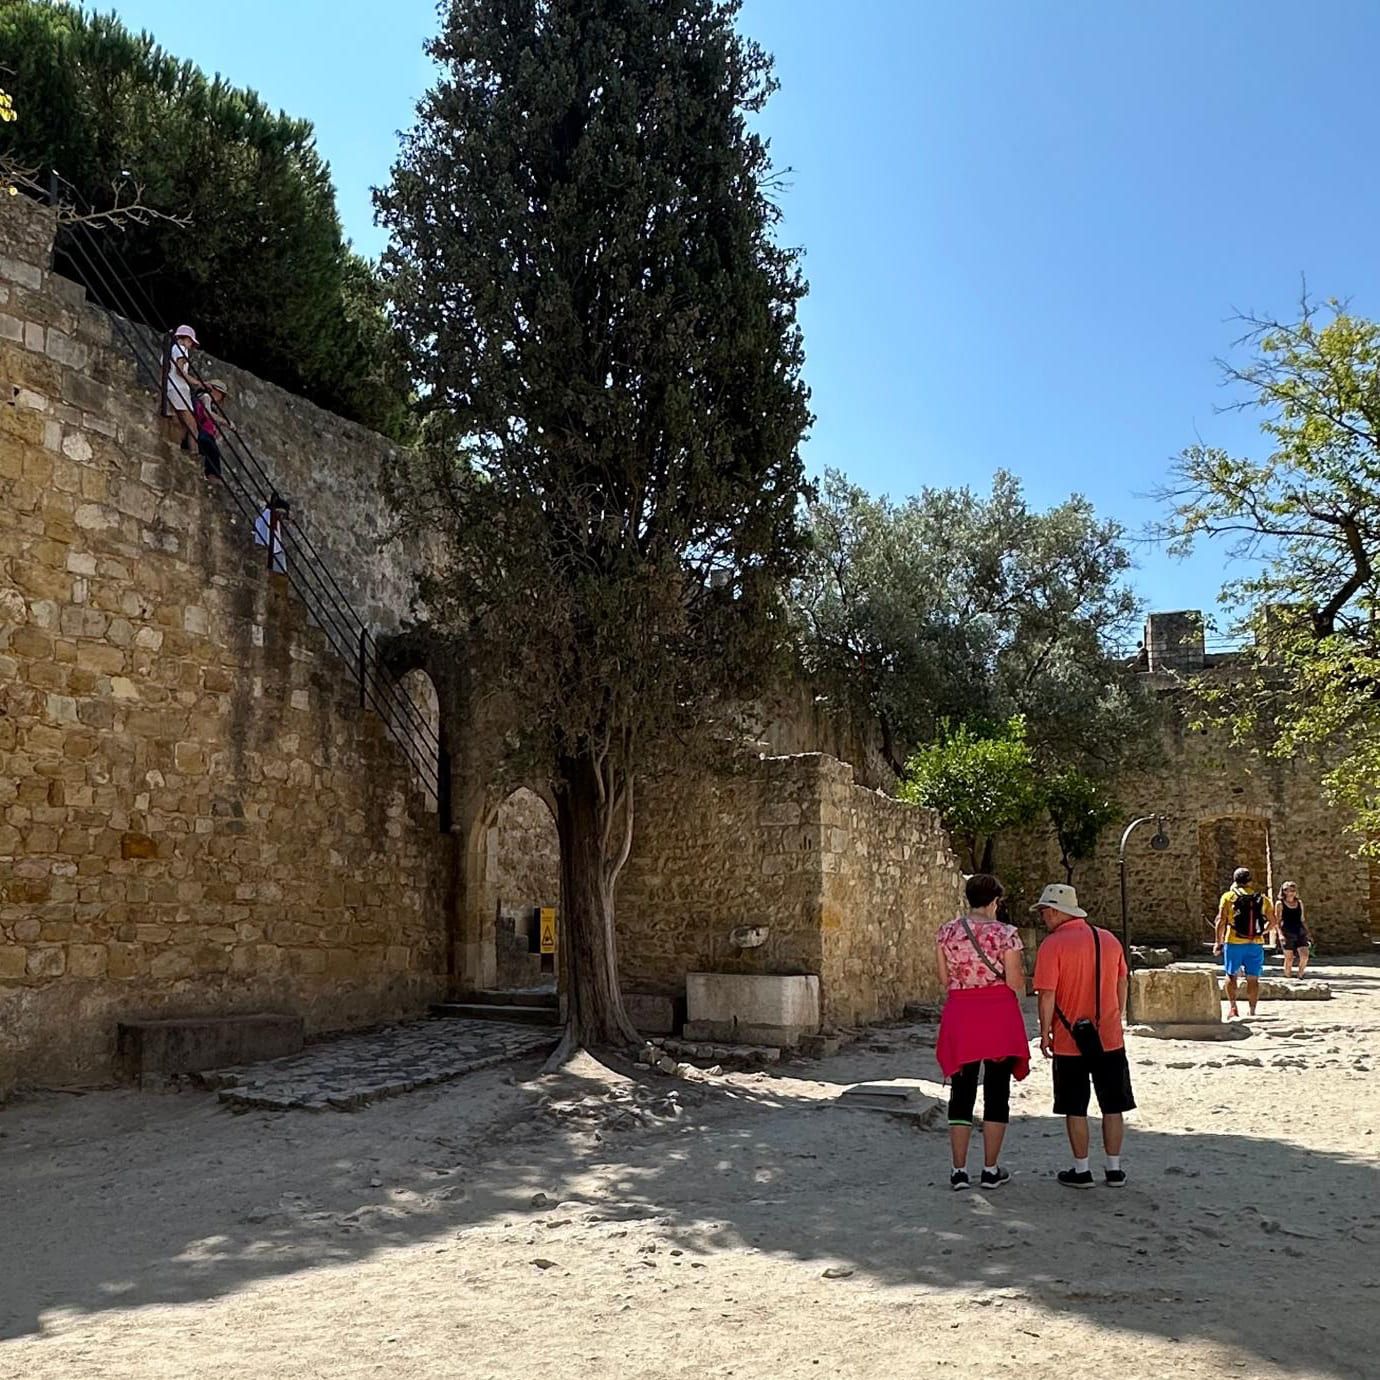
This is the most protected square in the castle. Everything we’ve seen and experienced so far was built to protect the place where you are standing now. In this area of the castle, defenders could rely on the water which was stored in a cistern, as long as it rained. Don’t forget that the most popular time to mount an attack was during the spring and summer.
There would certainly have been a silo for storing grain too, which would have been essential, just like the cistern, if the battle dragged on. We can also see here that there is a small opening in the wall, “The Gateway of Betrayal”. This gateway might have been used for sending messengers, for surprise attacks outside the castle, to escape, or even, as the name betrayal implies – for lovers to come and go.
But, returning to the attackers’ perspective, you can see that we still have walls all around us. It is here also that we can see the steps leading to the top of the wall. These steps represent a bigger obstacle than they might seem to. Firstly, there wouldn’t have been a handrail, which would make them much less safe nowadays, not to mention illegal. If you remember that most of us are right-handed and therefore hold our weapon in our right hand, the fact that the wall is on our right means that we have no room to fight, providing another important advantage to the defender. In addition, they would occupy a higher position than us.
It’s also important to note that, if we were attacking, this would probably be the first time we’d seen these steps, so we would have been unfamiliar with them. Steps these days are one thing, with the depth of each one regulated, but when these were made there were no building inspectors.
If you look closely at each individual step, you’ll see that they’re all different from the one before and the one after. We don’t know if this irregularity was deliberate, but it makes climbing difficult for those carrying combat equipment! A simple flight of stairs can quickly become a nightmare. -
XIV – Castle – Stairs to Round Path
Directions: climb the steps on your leftAt the top of the steps, we suggest you turn right and follow the path round to the Keep Tower, nowadays known as the Observatory Tower. Once again, imagine yourself walking this path, slaying opponents, and enjoy the breathtaking view of your surroundings. As you do so, a thought will surely cross your mind. “We’re almost there! We’re finally going to conquer the castle!”
-
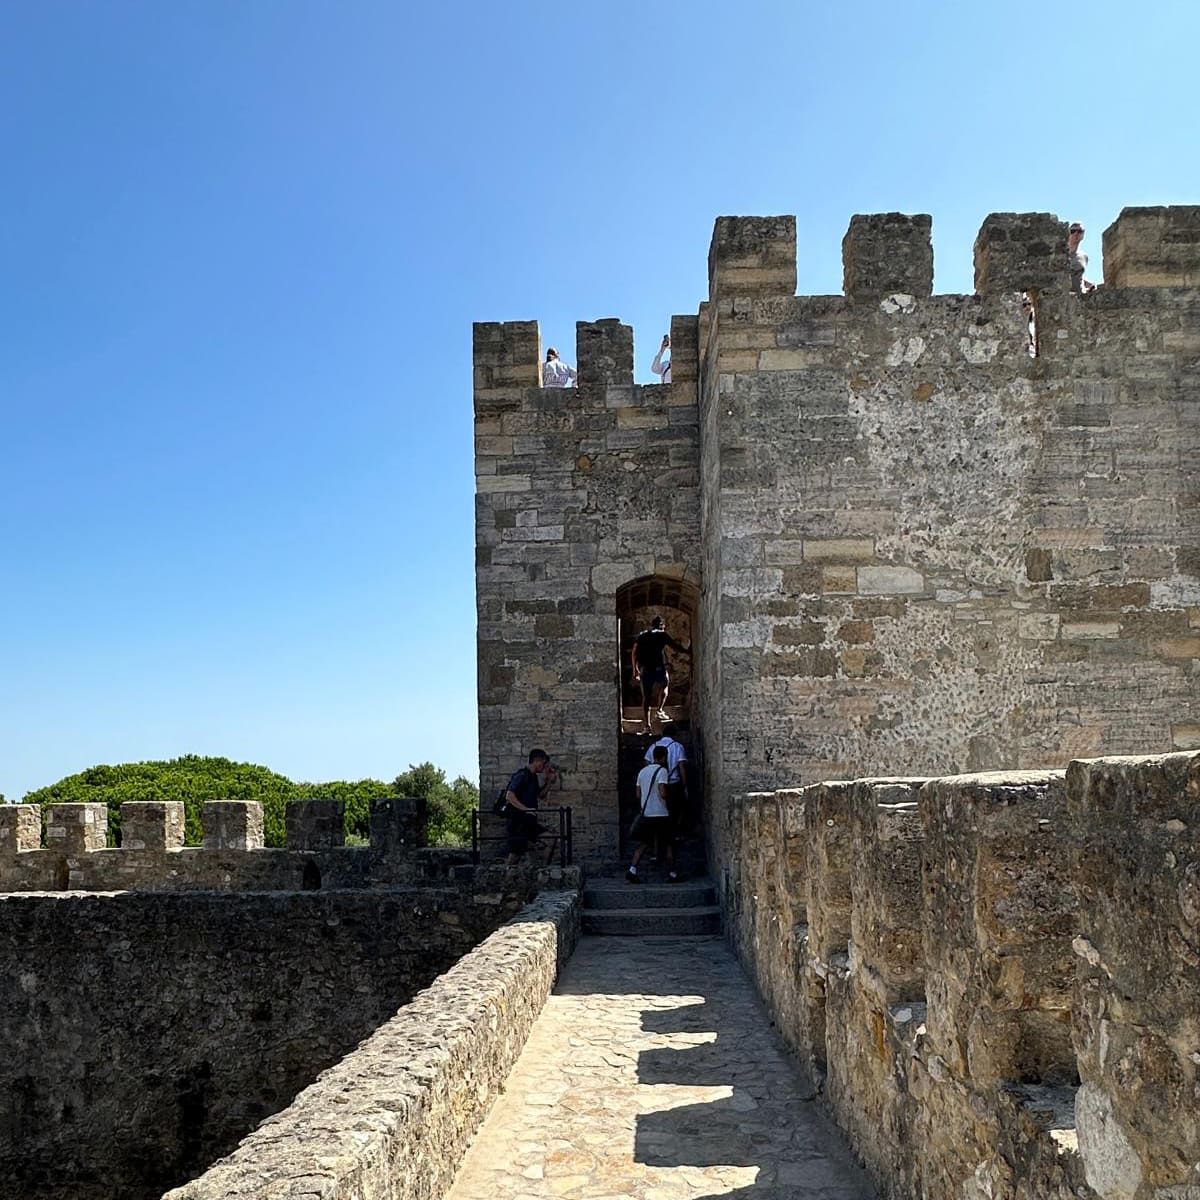
XV – Castle – Round Path – Observatory Tower
Directions: go straight ahead, at the end of the corridor turn left and walk down the next corridor to the last tower
Location: in front of the Observatory Tower stepsAs soon as you arrive at the tower, you notice. The way up to the top is incredibly narrow. Only one soldier at a time can walk it, especially when lugging all his military equipment. It’s worth remembering that when you kill an adversary, their corpse doesn’t just disappear like in computer games. You have to climb over it, walk over their body, and even slip on their blood and guts.
But worse still, you can now hear the war cries from the last of our opponents. There will only be a few of them now; 15, 20 or 25 men waiting for us. But if these men are still alive, and are in this tower guarding the flag, what kind of warriors will they be? I assure you, they are the best! They are ‘the elite’! Men whose role in life, practically from the moment they started walking, has been just one: to learn how to fight and kill. They’re perfect ‘war machines’. But, as this tour has to come to an end sooner or later, let’s imagine once again that we’ve killed them all and are now climbing up to the top of the tower.
-
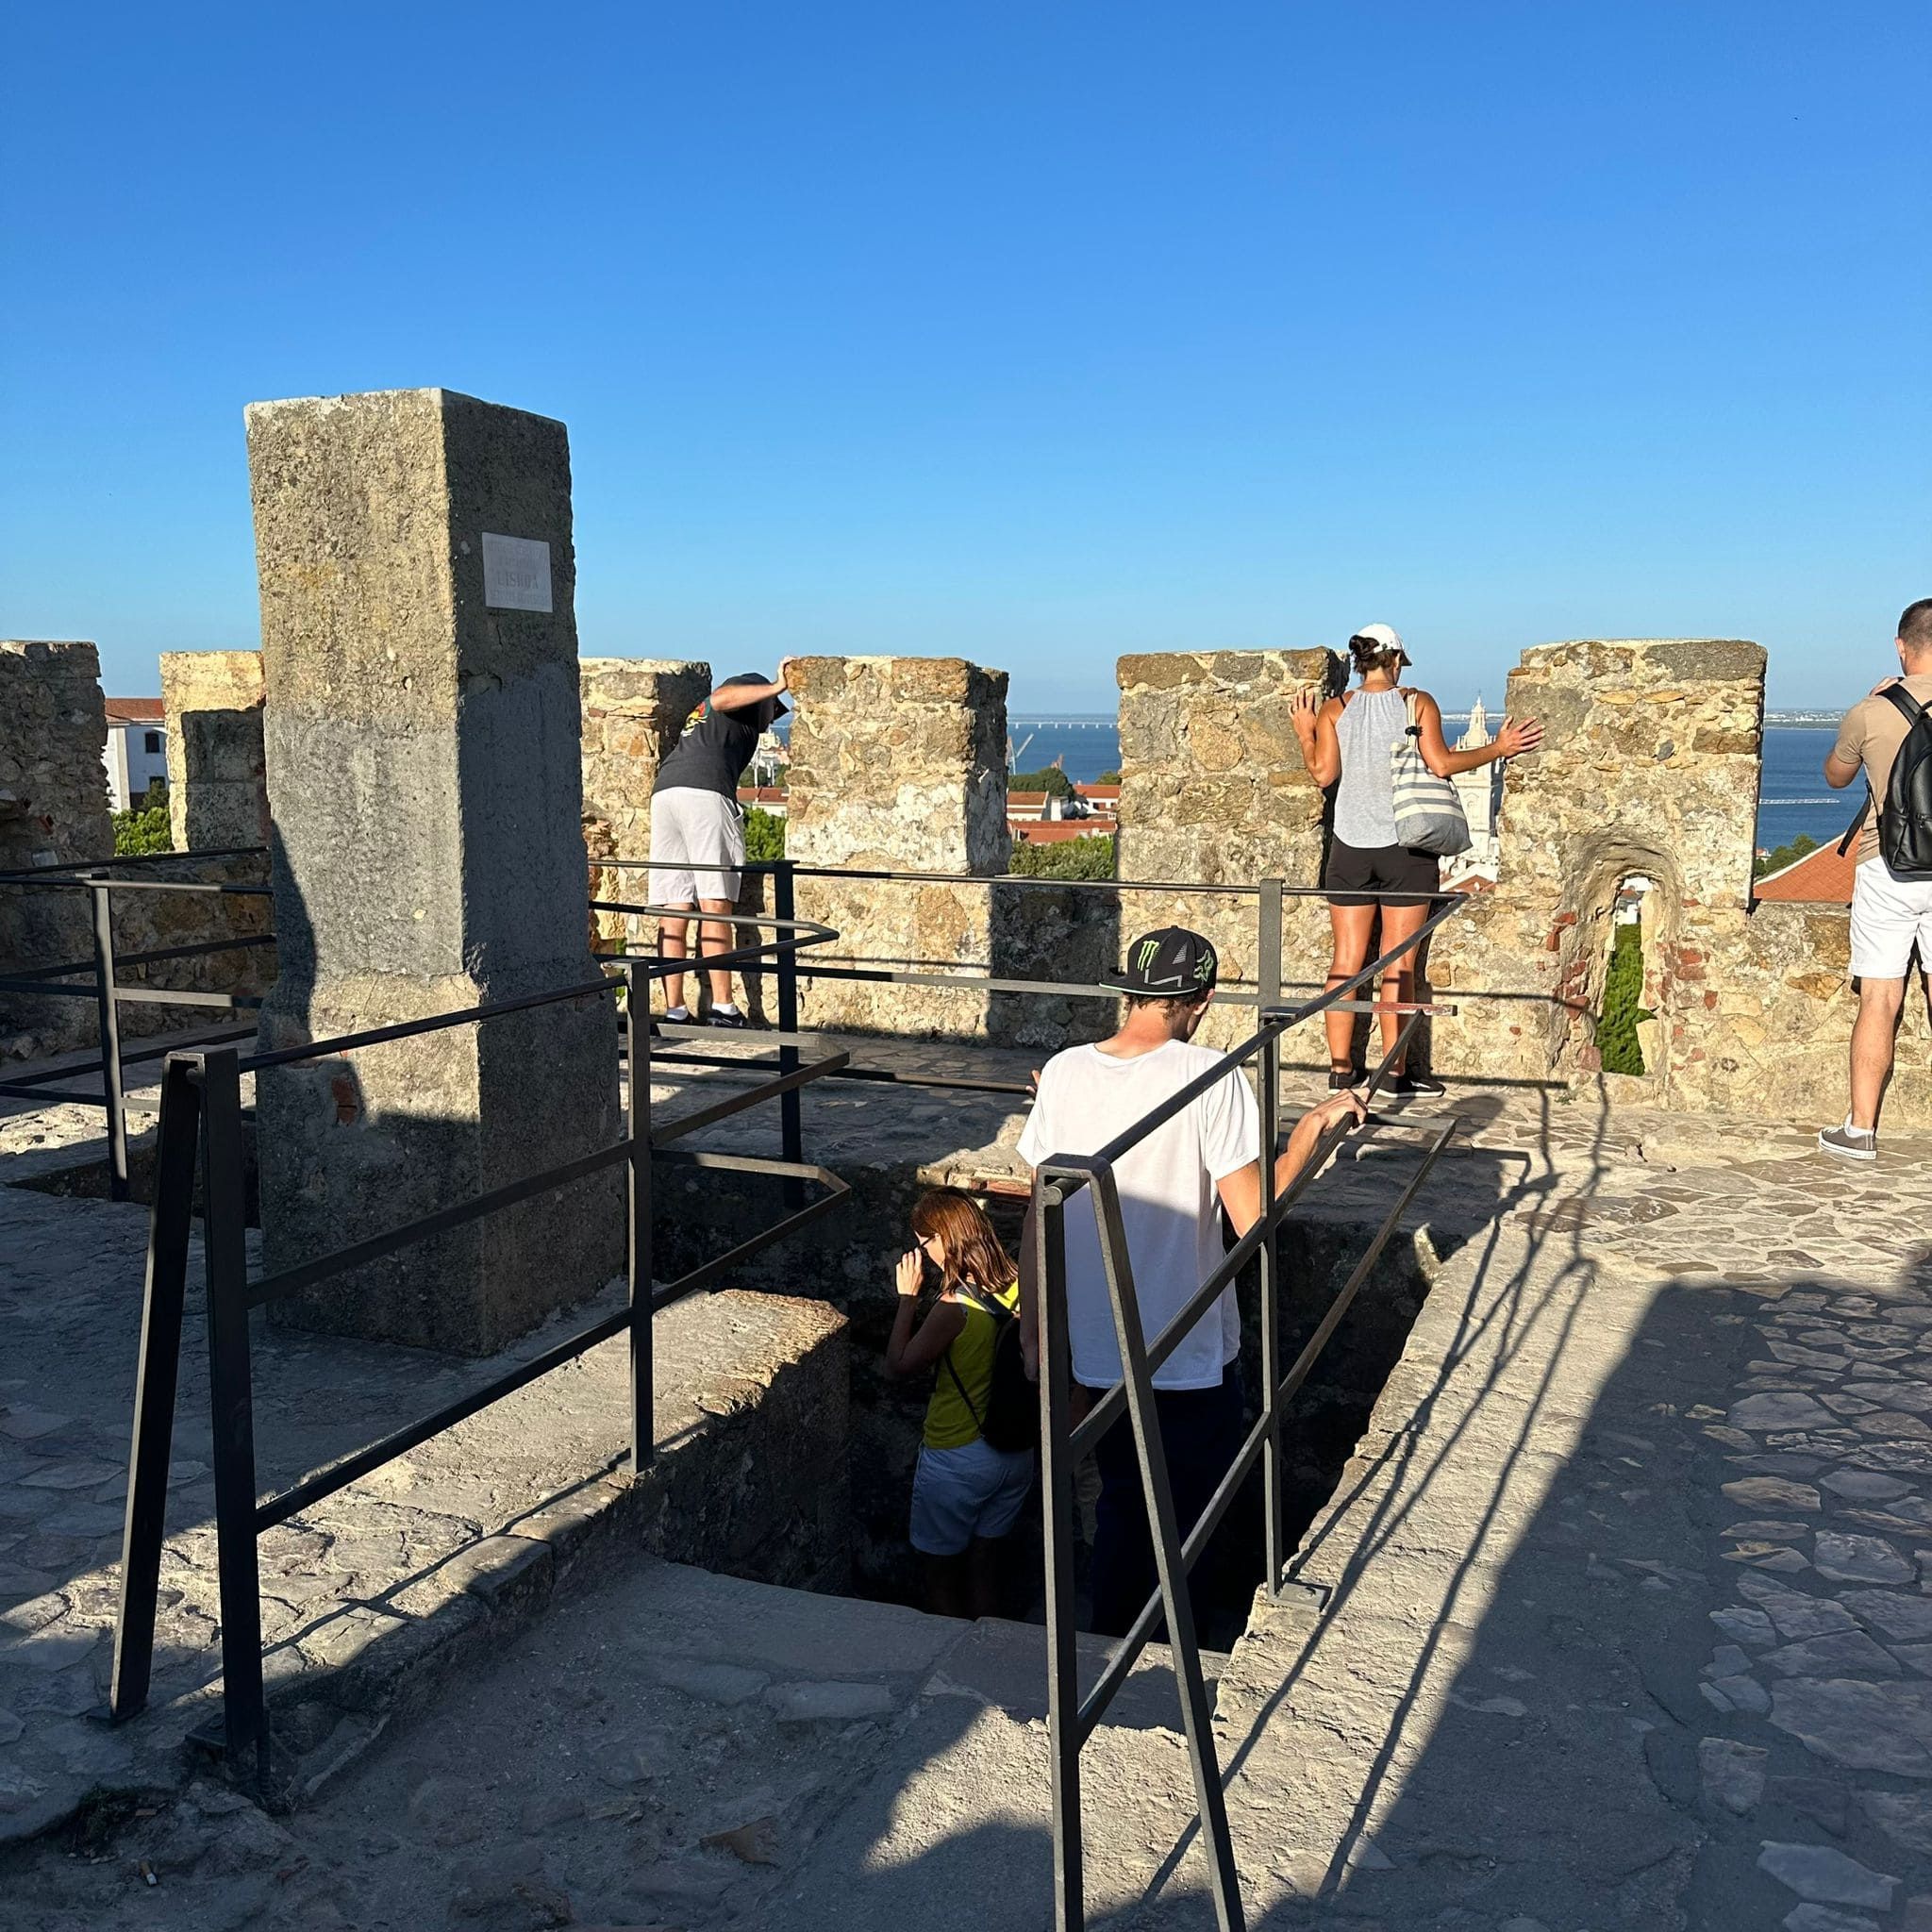
XVI – Observatory Tower
Directions: climb the Observatory Tower stairs
Now you’re at the top, you look around for the flag, but can’t find it! No, you haven’t been tricked. Nowadays it’s elsewhere, but in the Middle Ages, the city of Lisbon only lay to the south of the hill, so the flag might very well have been here because it would have been perfectly visible from this tower. Nowadays, the capital has grown so much that the flags of Portugal and Lisbon have been placed on the west side, overlooking the majority of the waterfront and the historic area of the city.
Back to our objective. You spot the imaginary flag and replace it with your own, flying it as high as possible. But, what for? Well, so that all the men still fighting for the city realise that the castle has been conquered! So, I congratulate you – insert the sound of applause – you have conquered the Castelo de São Jorge! And why am I congratulating you? Because you’ve done something that no-one else has ever done!
-
XVII – The Castle was conquered
In truth, the Castle was conquered, but never in this way.
In 1147, Lisbon was under Muslim rule. At that time it was known as Al-Ushbuna and was a city that stretched over this hill down to the River Tagus and was surrounded by walls.
That year, Afonso Henriques, the first king of Portugal, besieged the city with the help of the Crusaders.Anglo-Norman forces occupied the western part of the city, which is now the Chiado area; the Portuguese and Franks blockaded the northern part, on Graça hill; the Germanic and Flemish camp was stationed in the eastern part of the city, where the monastery of São Vicente de Fora was to be built and, finally, a smaller Italian contingent guarded the river. After almost four months of siege, the Muslims, lacking supplies and without hope of outside help, surrendered to the Christian forces and to Afonso Henriques, who entered the city on 25 October 1147 and came up to the castle to raise his flag.
Finally, we shouldn’t think that a siege is a guarantee of success. In 1384, when Lisbon was besieged for several months by Castilian troops, the city’s defenders resisted, but, truth be told, they had a little help. That year, there was an outbreak of the plague, which is another reason why the siege was lifted.
-
XVIII – End of Adventure
So we’ve come to the end of our adventure. We don’t expect that, in a few months’ or years’ time, you’ll remember in which year the Battle of Guadalete (711) took place, but when you visit other fortifications, remember the hardships you went through here and never forget: a castle is built never to be conquered!
Until forever Soldier!


